Getting Started
Here in this page we will take a basic understanding about how DOM Cloud works and how to set up your own website quickly. There's also a video walktrough if you prefer that.
Create a Website
Go to create a website page. If you haven't logged in, you will be redirected to the login page. Below is the screenshot of that page.
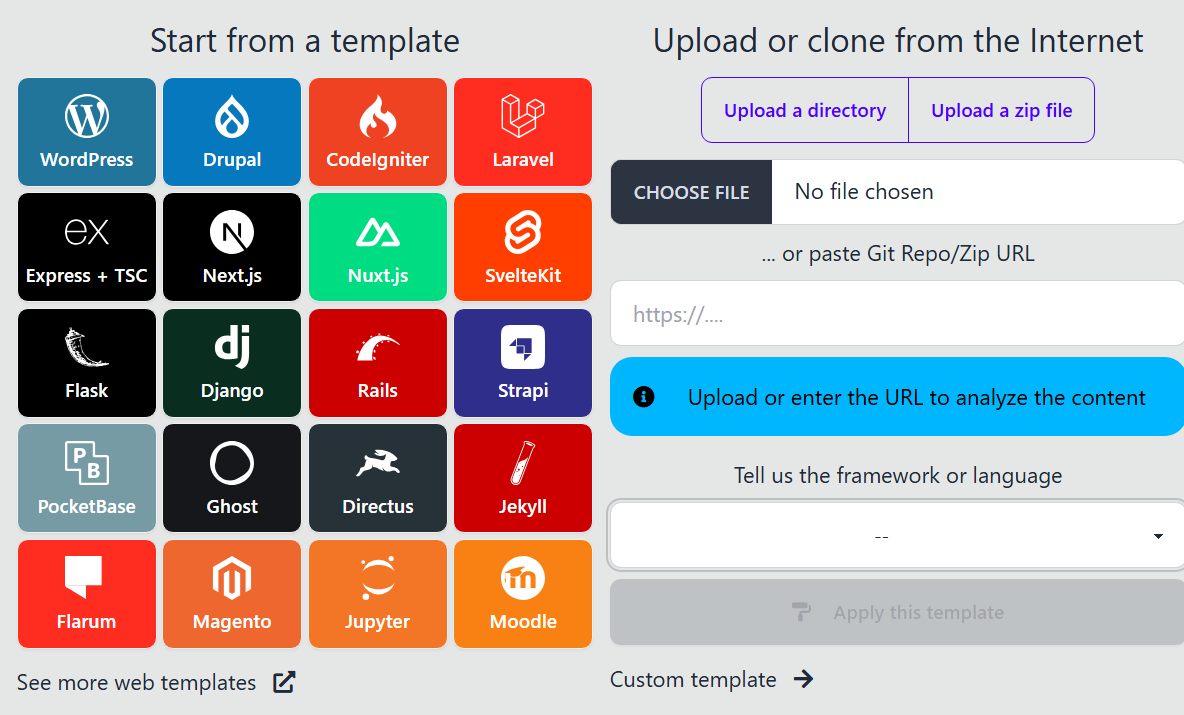
You can either choose to start from a template (left side) or Upload / Clone from the Internet (right side).
Start From Template
If you want to create a website from stratch, start from here. You just have to select which kind of framework or CMS you will start with.
The CMS or Framework can be further edited directly using their respective admin tools from the website or VS Code editor (read below).
Upload or Clone
If you have an existing project on GitHub or your local computer, use this option.
It's easy as dropping your project directory, or copy-pasting your repository URL on GitHub. Then, choose which framework or language it's used to.
If your GitHub repo is private, it will ask you to install a new SSH public key (so it can be cloned from this server). Read more about GitHub Integration, this includes set-up a webhook to keep the website in sync with latest commits in repo.
Custom Template
You can skip templates by clicking Custom Template in the right bottom side of the page.
After Choosing Template
After choosing starting template or existing project. The next dialog appears:
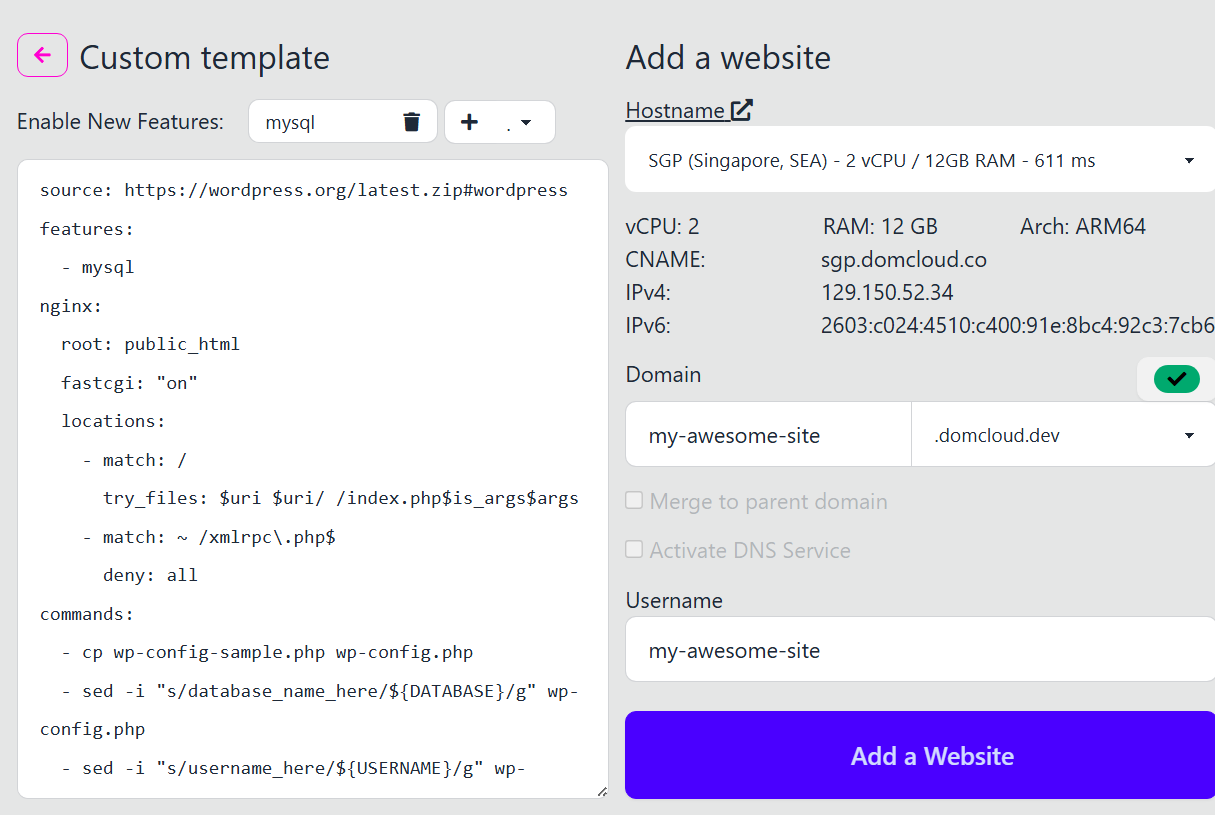
On the left side, it contains the YAML template of a template you've selected. The right side contains options to choose where to deploy.
Hostname
This is the server location in which your site will deploy. It shows location, the server spec, the latency from your location, and IP Addresses which will be useful later.
Domain
This is the domain name you want to use for your website. You can enter a custom domain that you own or switch to *.domcloud.dev if you have a paid plan. Read more about integrating custom domain here or default domains here.
If you plan to use a custom domain, The green checkbox will check if your DNS is already configured correctly (by checking if A/AAAA/CNAME record match with IP addresses mentioned). If the check doesn't pass, it will be shown as a warning.
Merge to Parent Domain?
This is a check box that's available if you use an existing website as the parent domain at the same server. If this checked, you'll create a subserver inside that parent, instead of creating from stratch.
Merging to parent domain has the benefit of sharing code with parent domain, also doesn't increasing your instance count. However, managing it may be a little more complex.
Activate DNS Service?
If you've set your domain's Name Server to us, check this box. The validation will be automatically checked as green as we can't check reliably if you've set Name Server correctly.
Username
This is the username you want to use to identify logins to your website. You can leave it random or use any username you want, but it must be unique. This username is invisible to the public.
Click "Add a Website"
After finishing the previous step, you will be directed to the runner page of the newly created website where you can watch the progress of the setup. Below is the screenshot of that page.
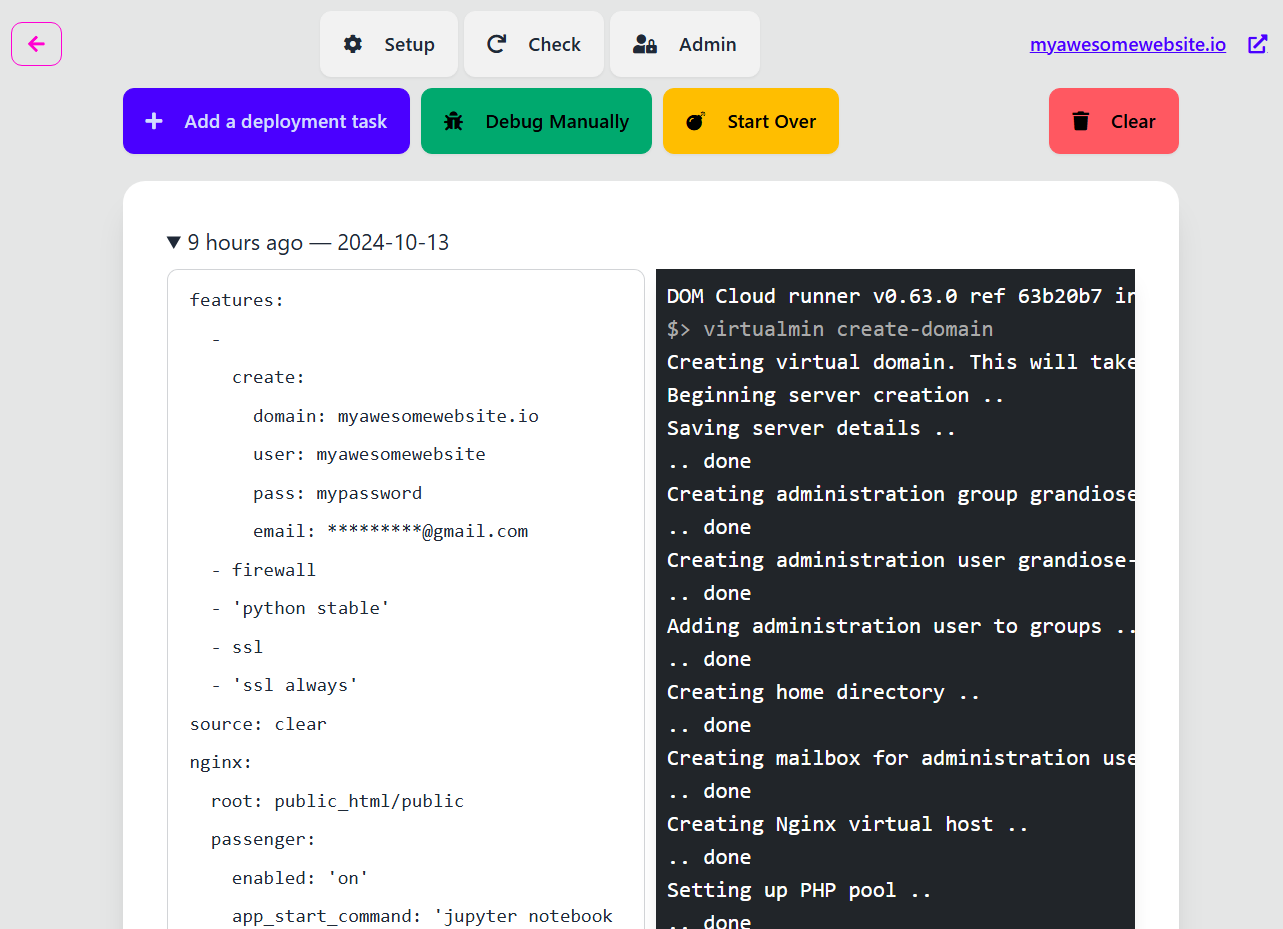
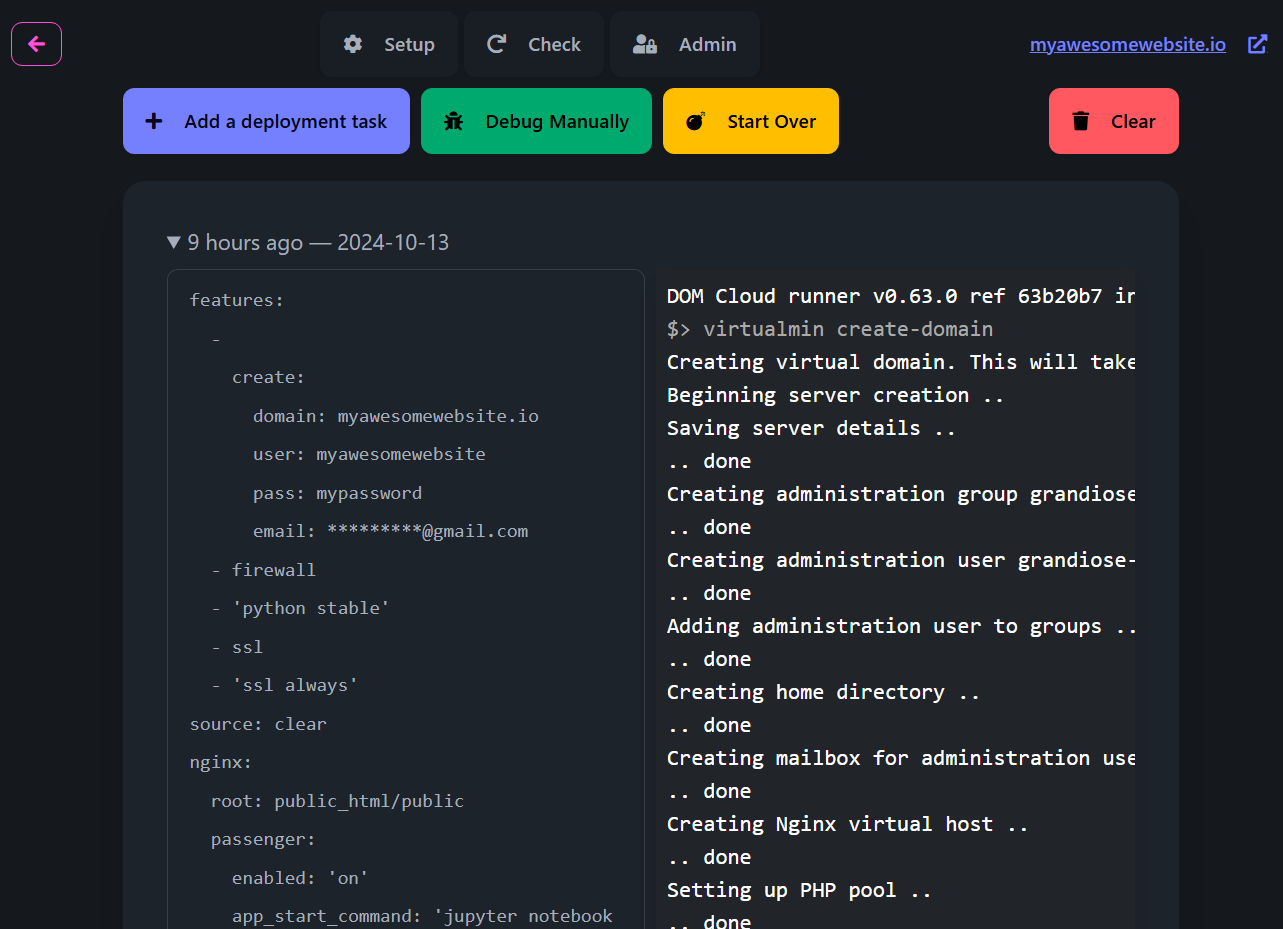
You have to wait until the setup is finished.
When it finished there will be a message saying "Your website is ready!" and a button to open the website when it's ready.
Managing Website
You can see these menus at the left of your screen to manage your sites using different sections.

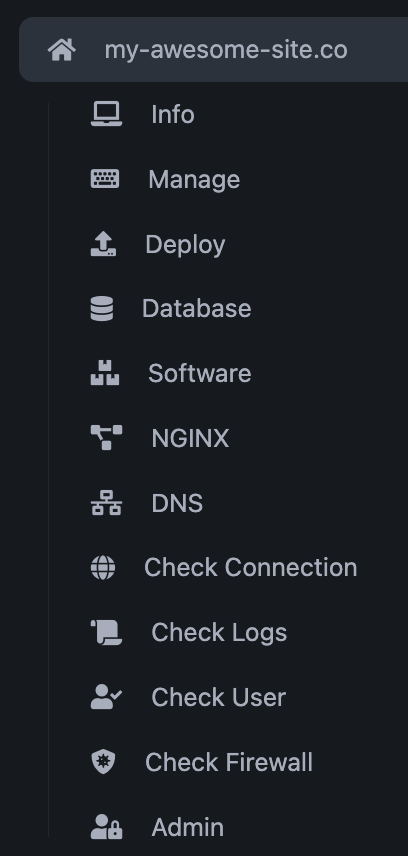
| Menu Name | What it is? |
|---|---|
| Info | Site stats, such as current storage and bandwidth |
| Manage | Access to site data such as files, databases and SSH keys |
| Deploy | Execute templates, run automated scripts and manage features |
| Database | Create or drop MariaDB or PostgreSQL databases |
| Software | Check version or install code languages [WIP Feature] |
| NGINX | Edit NGINX directly or via interactive options |
| CDNS | Check and Edit DNS records (if using our Name Server) |
| Check Connection | Check DNS and other issues to make sure the website is working |
| Check Logs | Examine NGINX error, site traffic and application logs |
| Check User | Display UNIX user information [WIP Feature] |
| Check Firewall | Check If Firewall (Backend API whitelist) enabled |
| Admin | Change username, domain name, password, delete server, etc. |
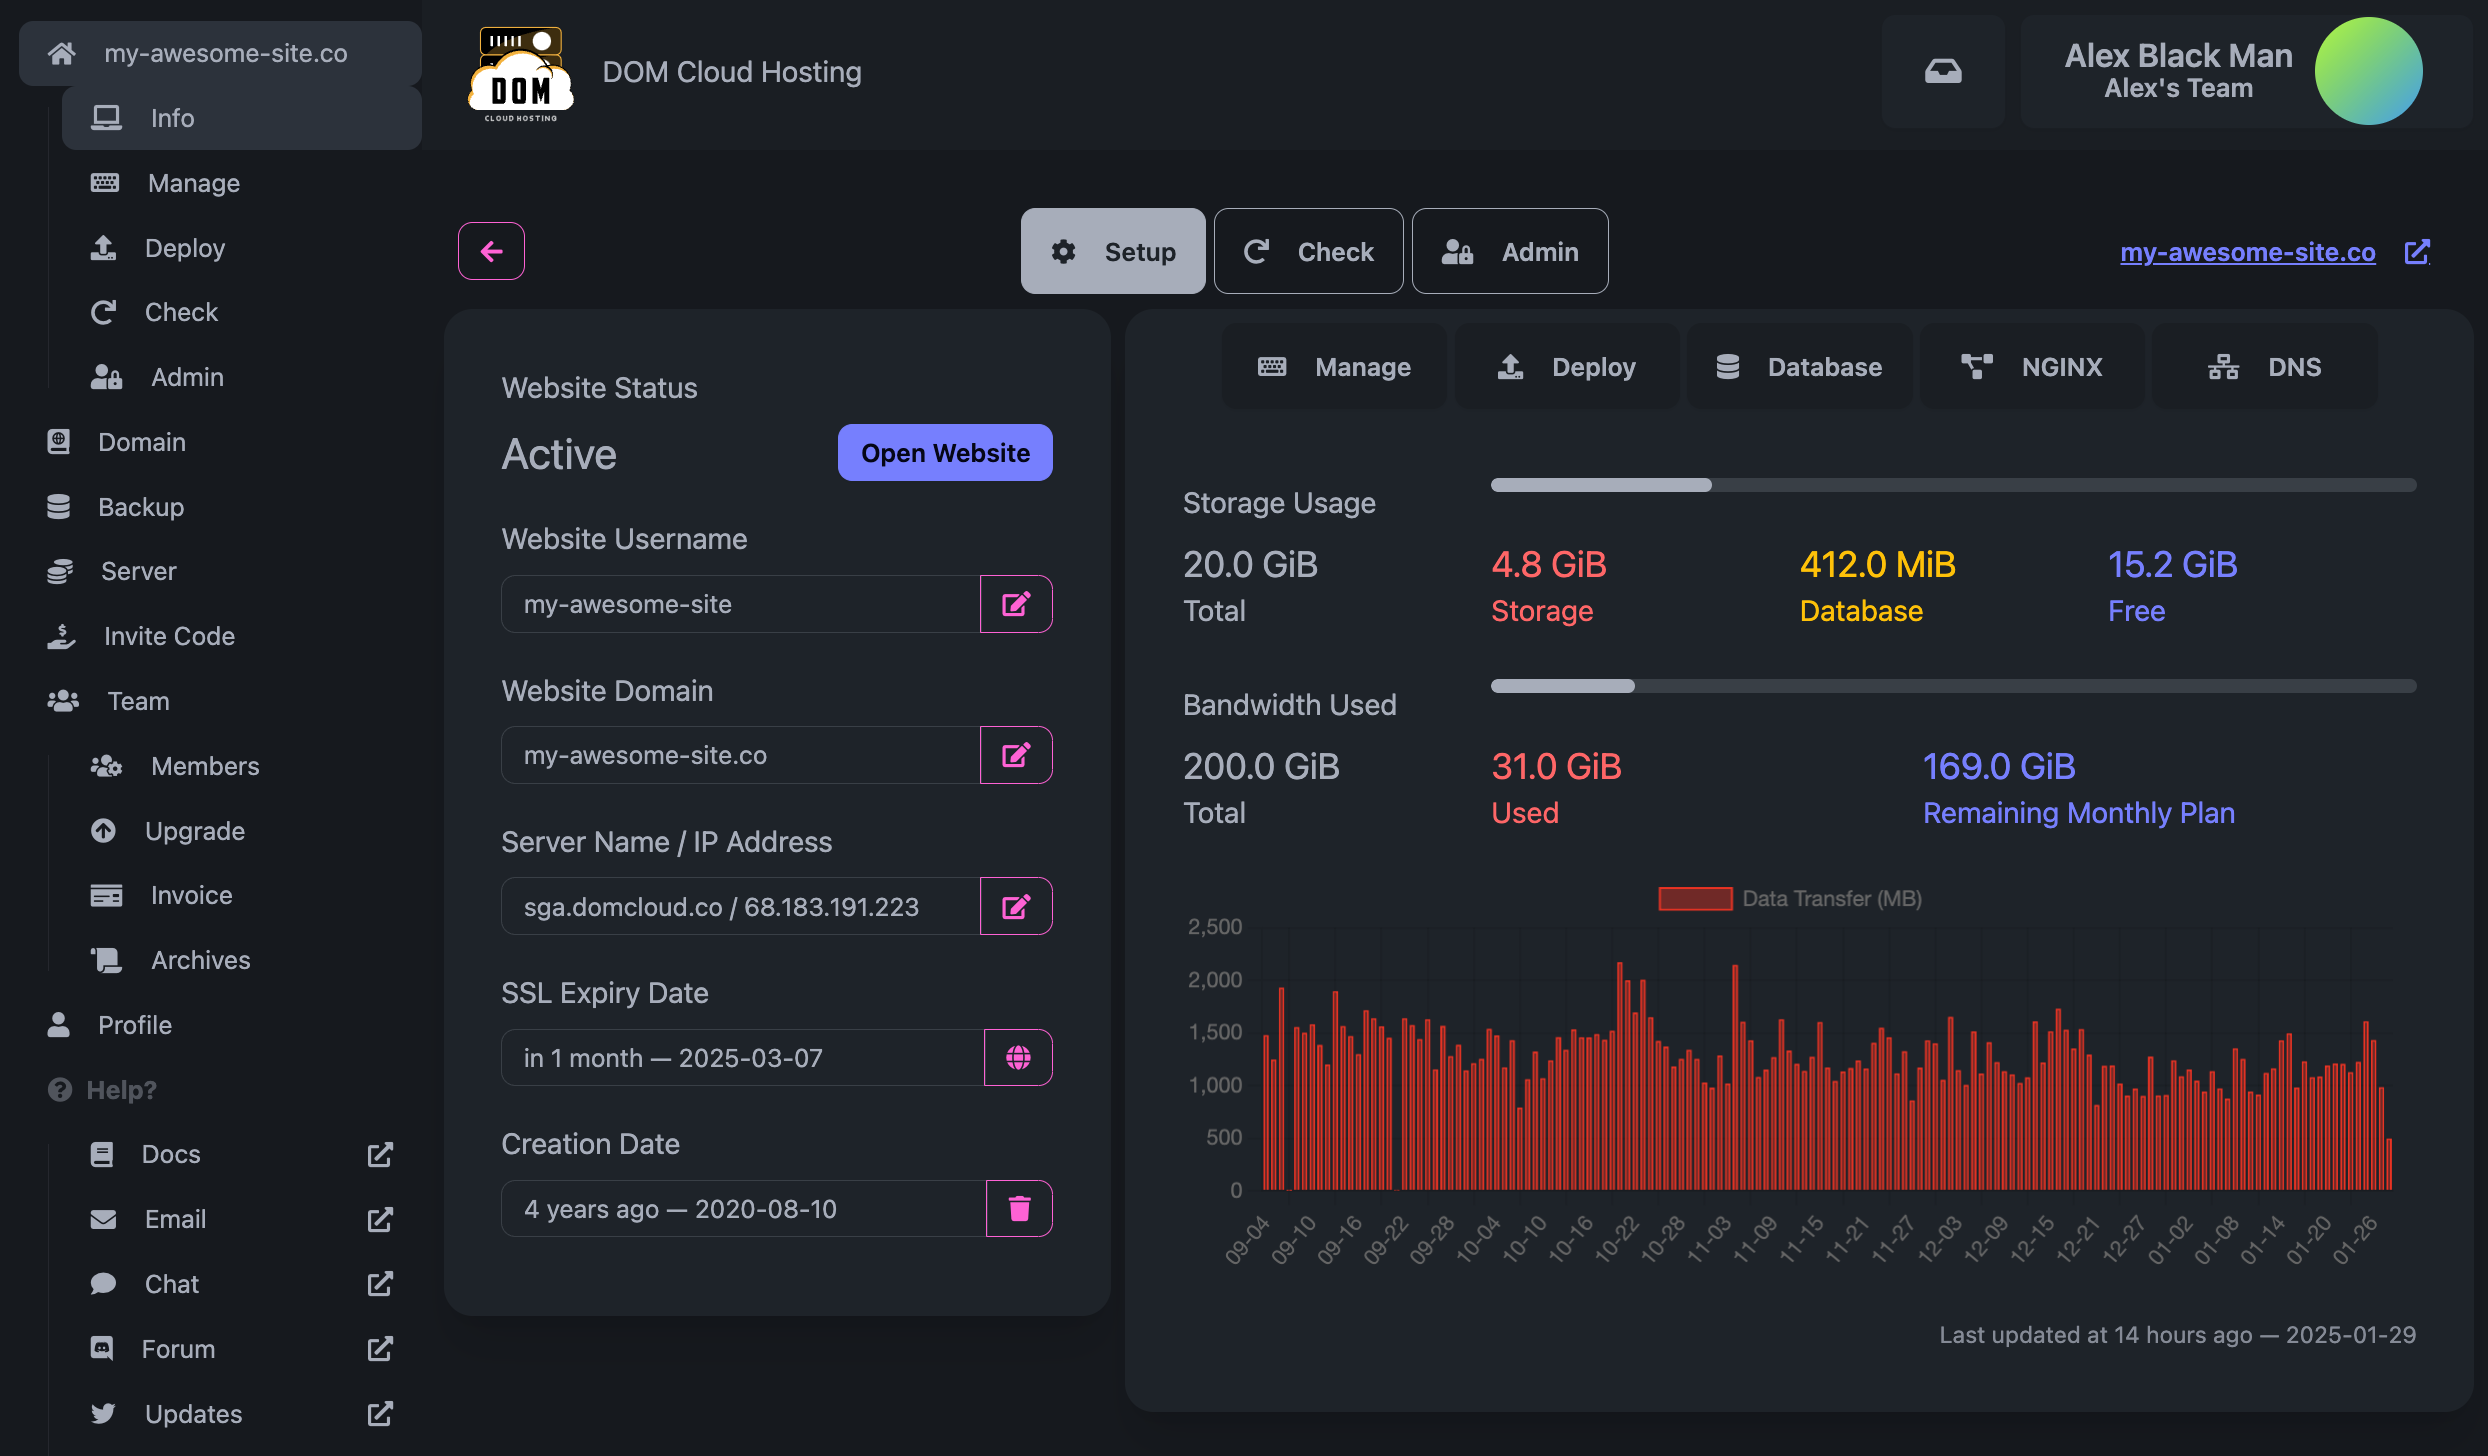
The Info section contains information about your website, such as some general information including storage usage, bandwidth usage, and the server where your website is hosted.
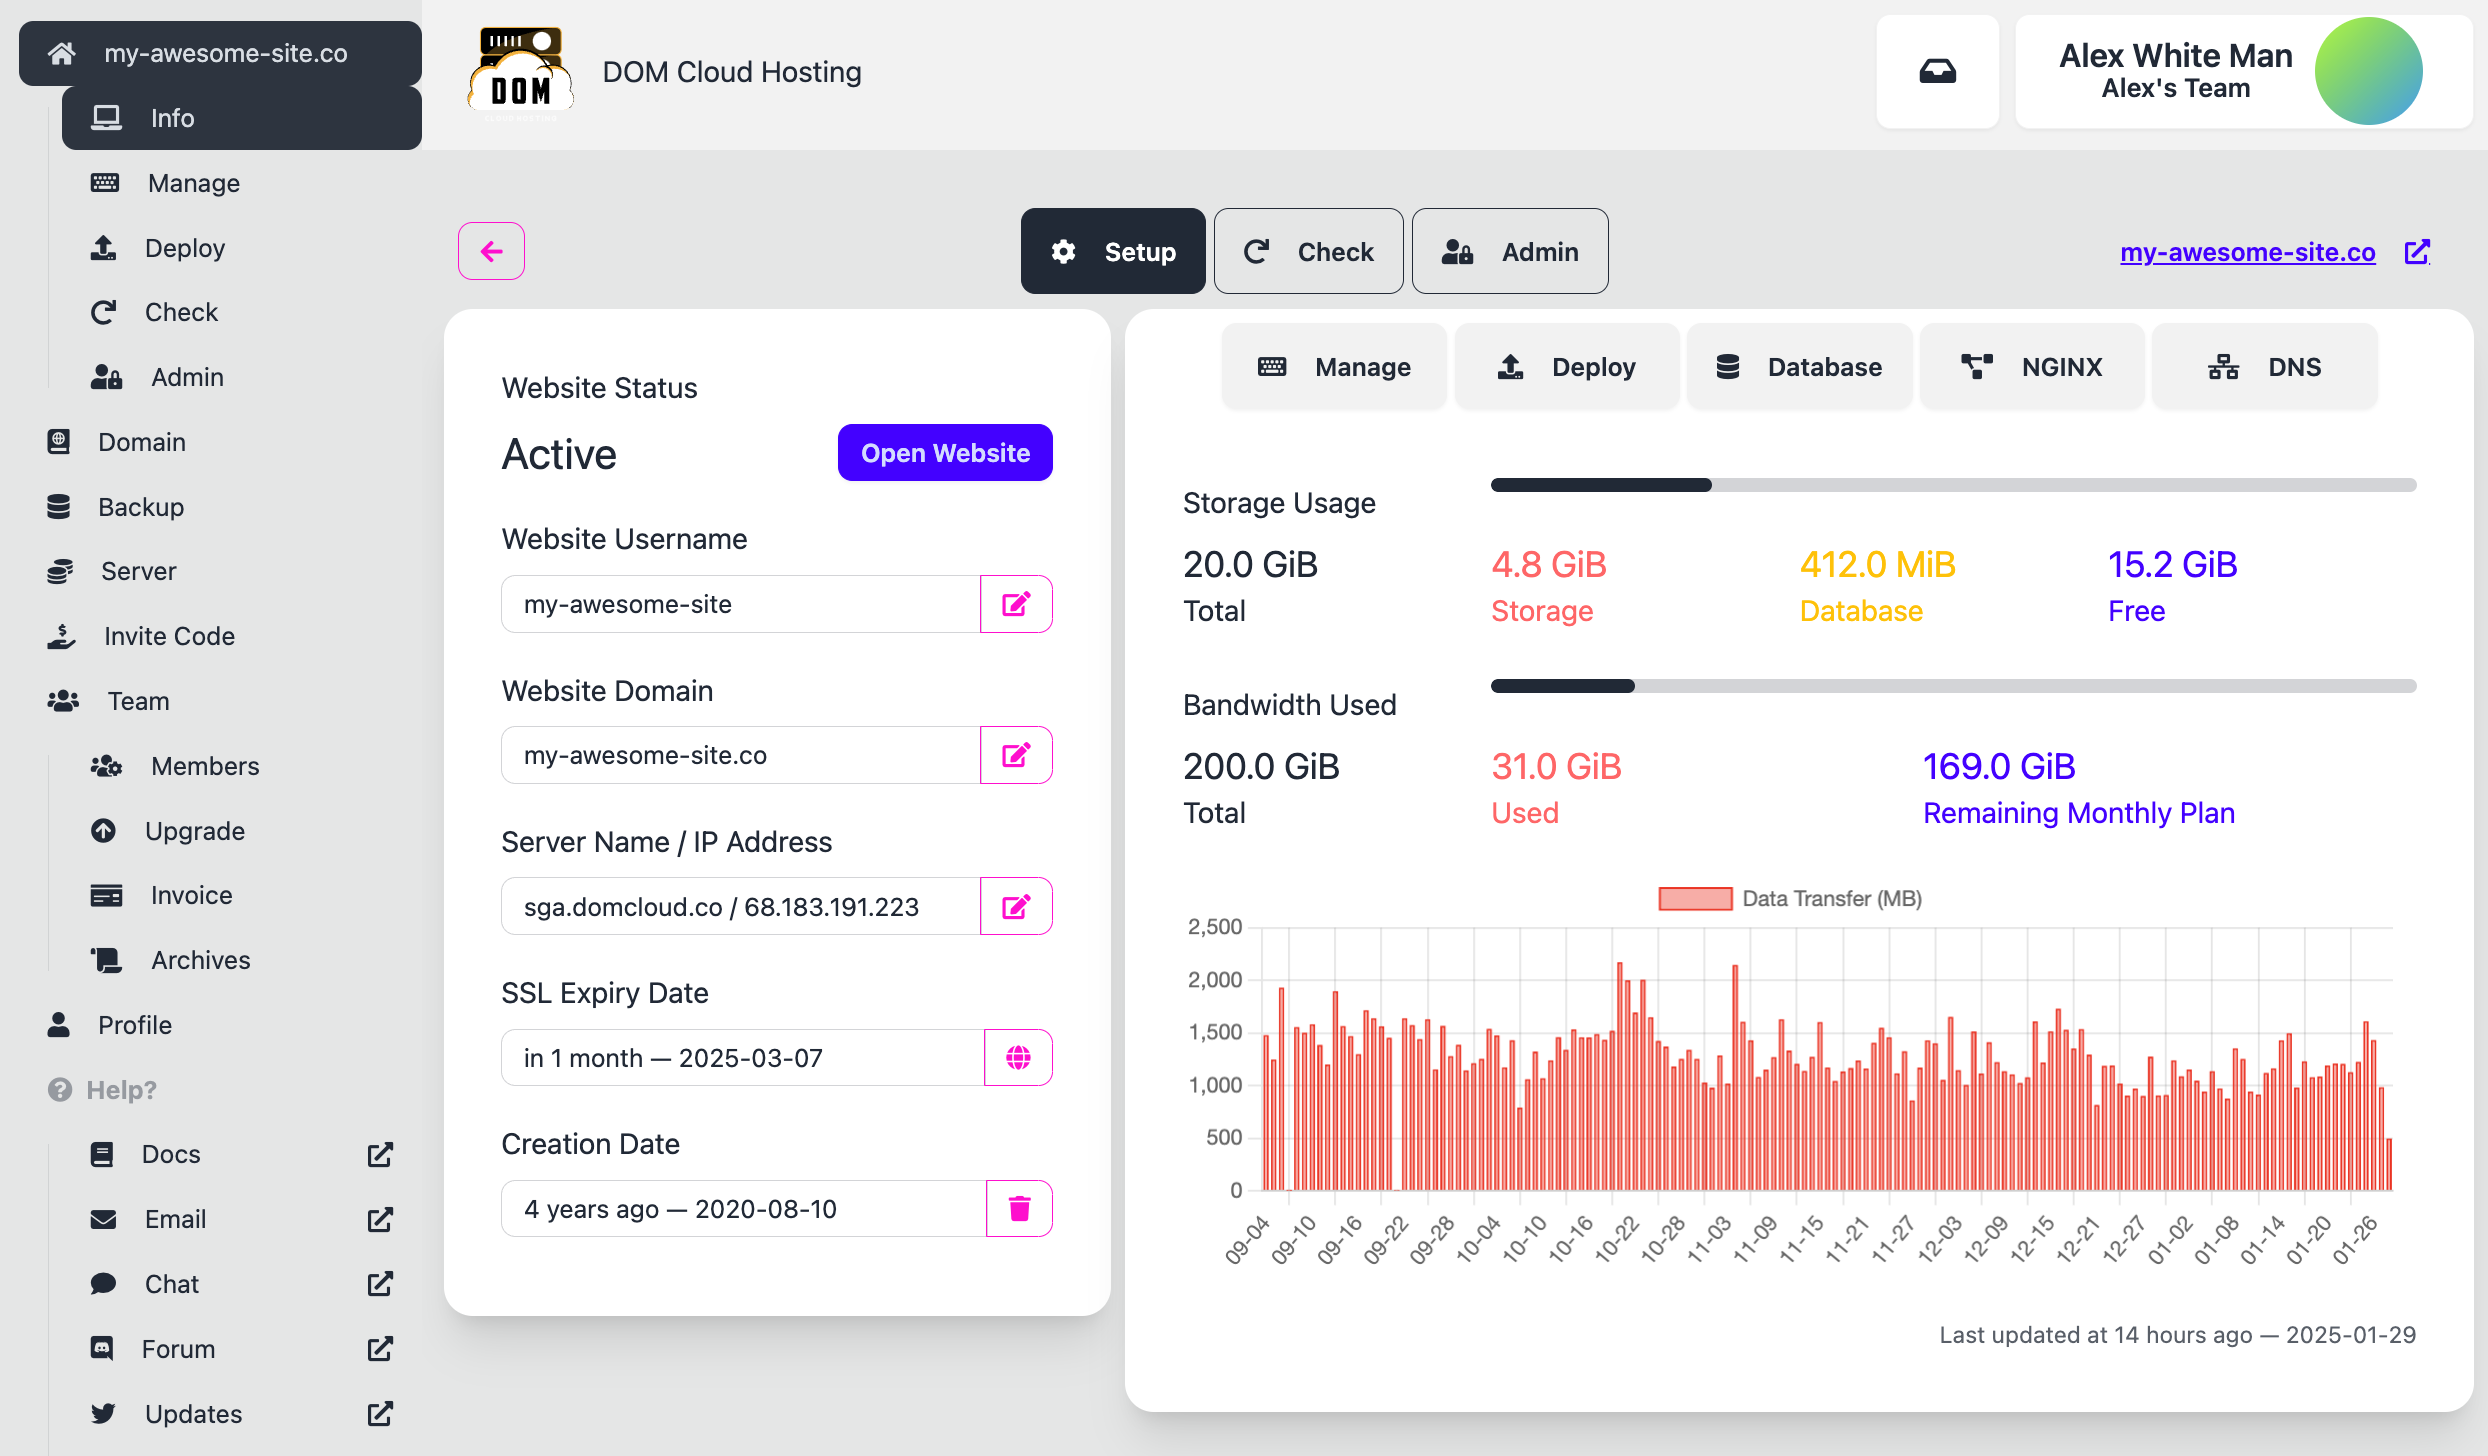
One particular useful section that you'll use often is the Manage section. It contains links to edit your website and also credentials to access your website. Below is the screenshot of that page.
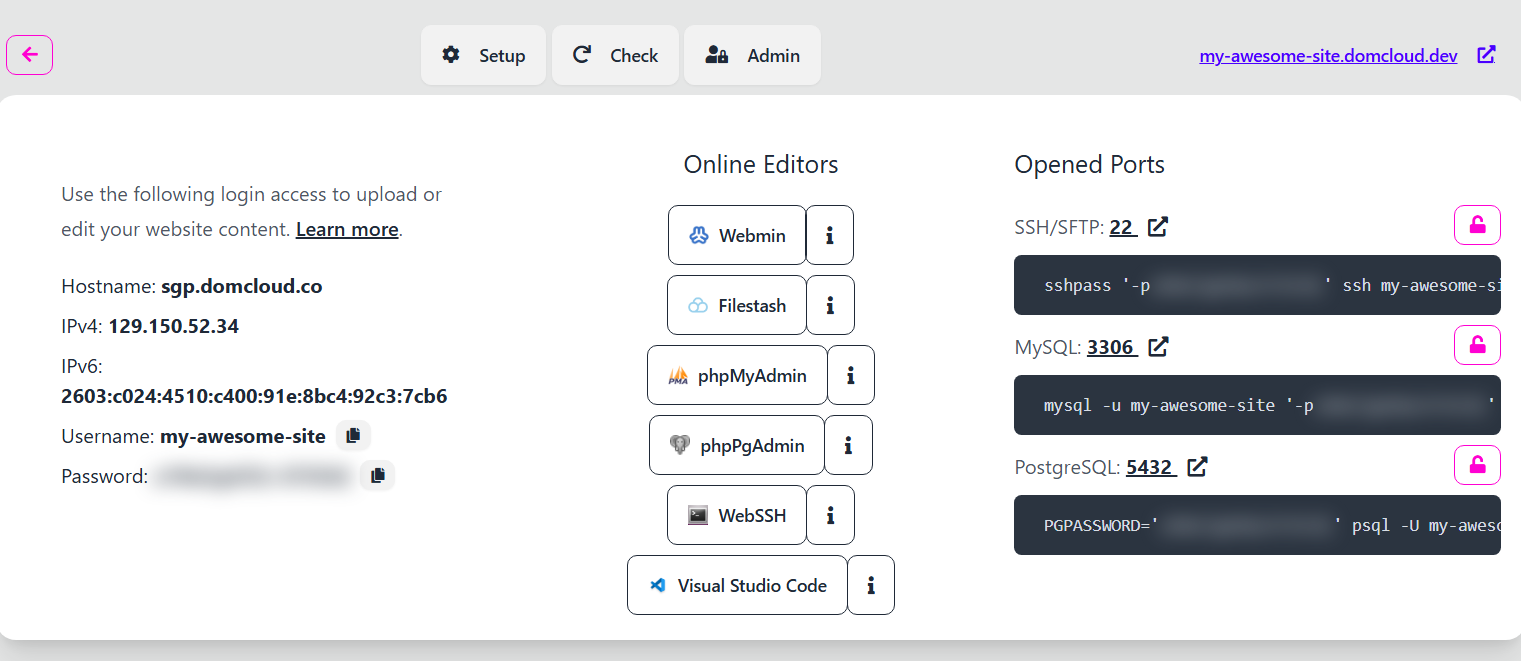
Tools that you can use to manage your website here is explained more in Editor Documentation.
Deploy Tab
The deploy tab is where you can configure the rest of your website. Below is the screenshot of that page.
It's a powerful tool to configure (or automate) your website setup. It allows you to:
- Configure NGINX rules and define how to boots up your websites
- Configure databases, DNS, TLS, and other services
- Install additional languages and tools
- Run custom scripts to automate your deployment
This feature alone is what makes DOM Cloud different from other hosting providers. It's a powerful tool that allows you to configure your website in any way you want. We have dozens of templates (called recipes) to setup your website with various languages and tools. You can also create your own recipes and share it with others.
The top side buttons has a menu labeled Add a deployment task to submit a new deployment task. A new deployment task is incremental — it won't rebuild your site from stratch. To recreate again like a brand new site use the menu labeled Start Over.
Read more about Deployments via Deploy Section
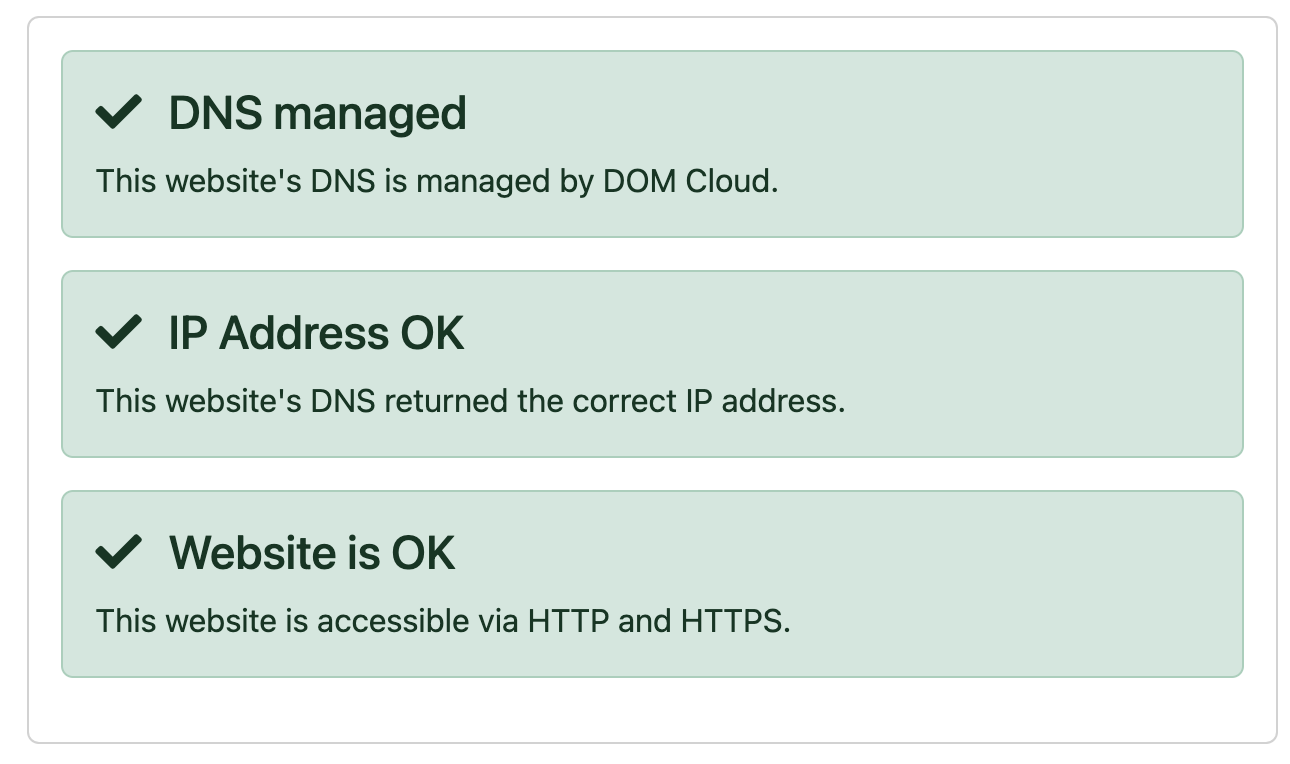
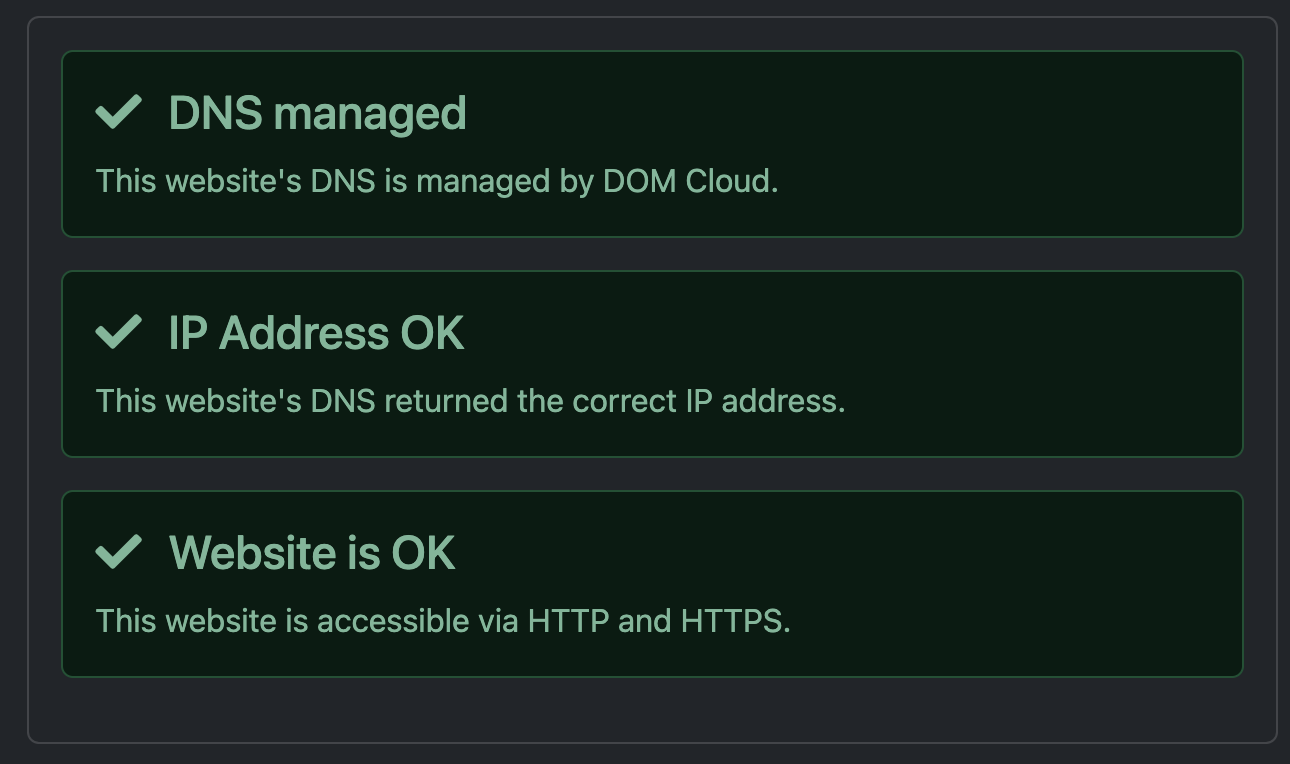
Check Connection
The connection section let's you check if DNS configured properly. Always check here if you use custom domain. It may give you helpful information to diagnose DNS problems and one-click button fixes if possible.
Edit NGINX
The NGINX section tells you how is your app is supposed to run. It comes with an interactive UI to help you configure it without extensive knowledge of how NGINX works.
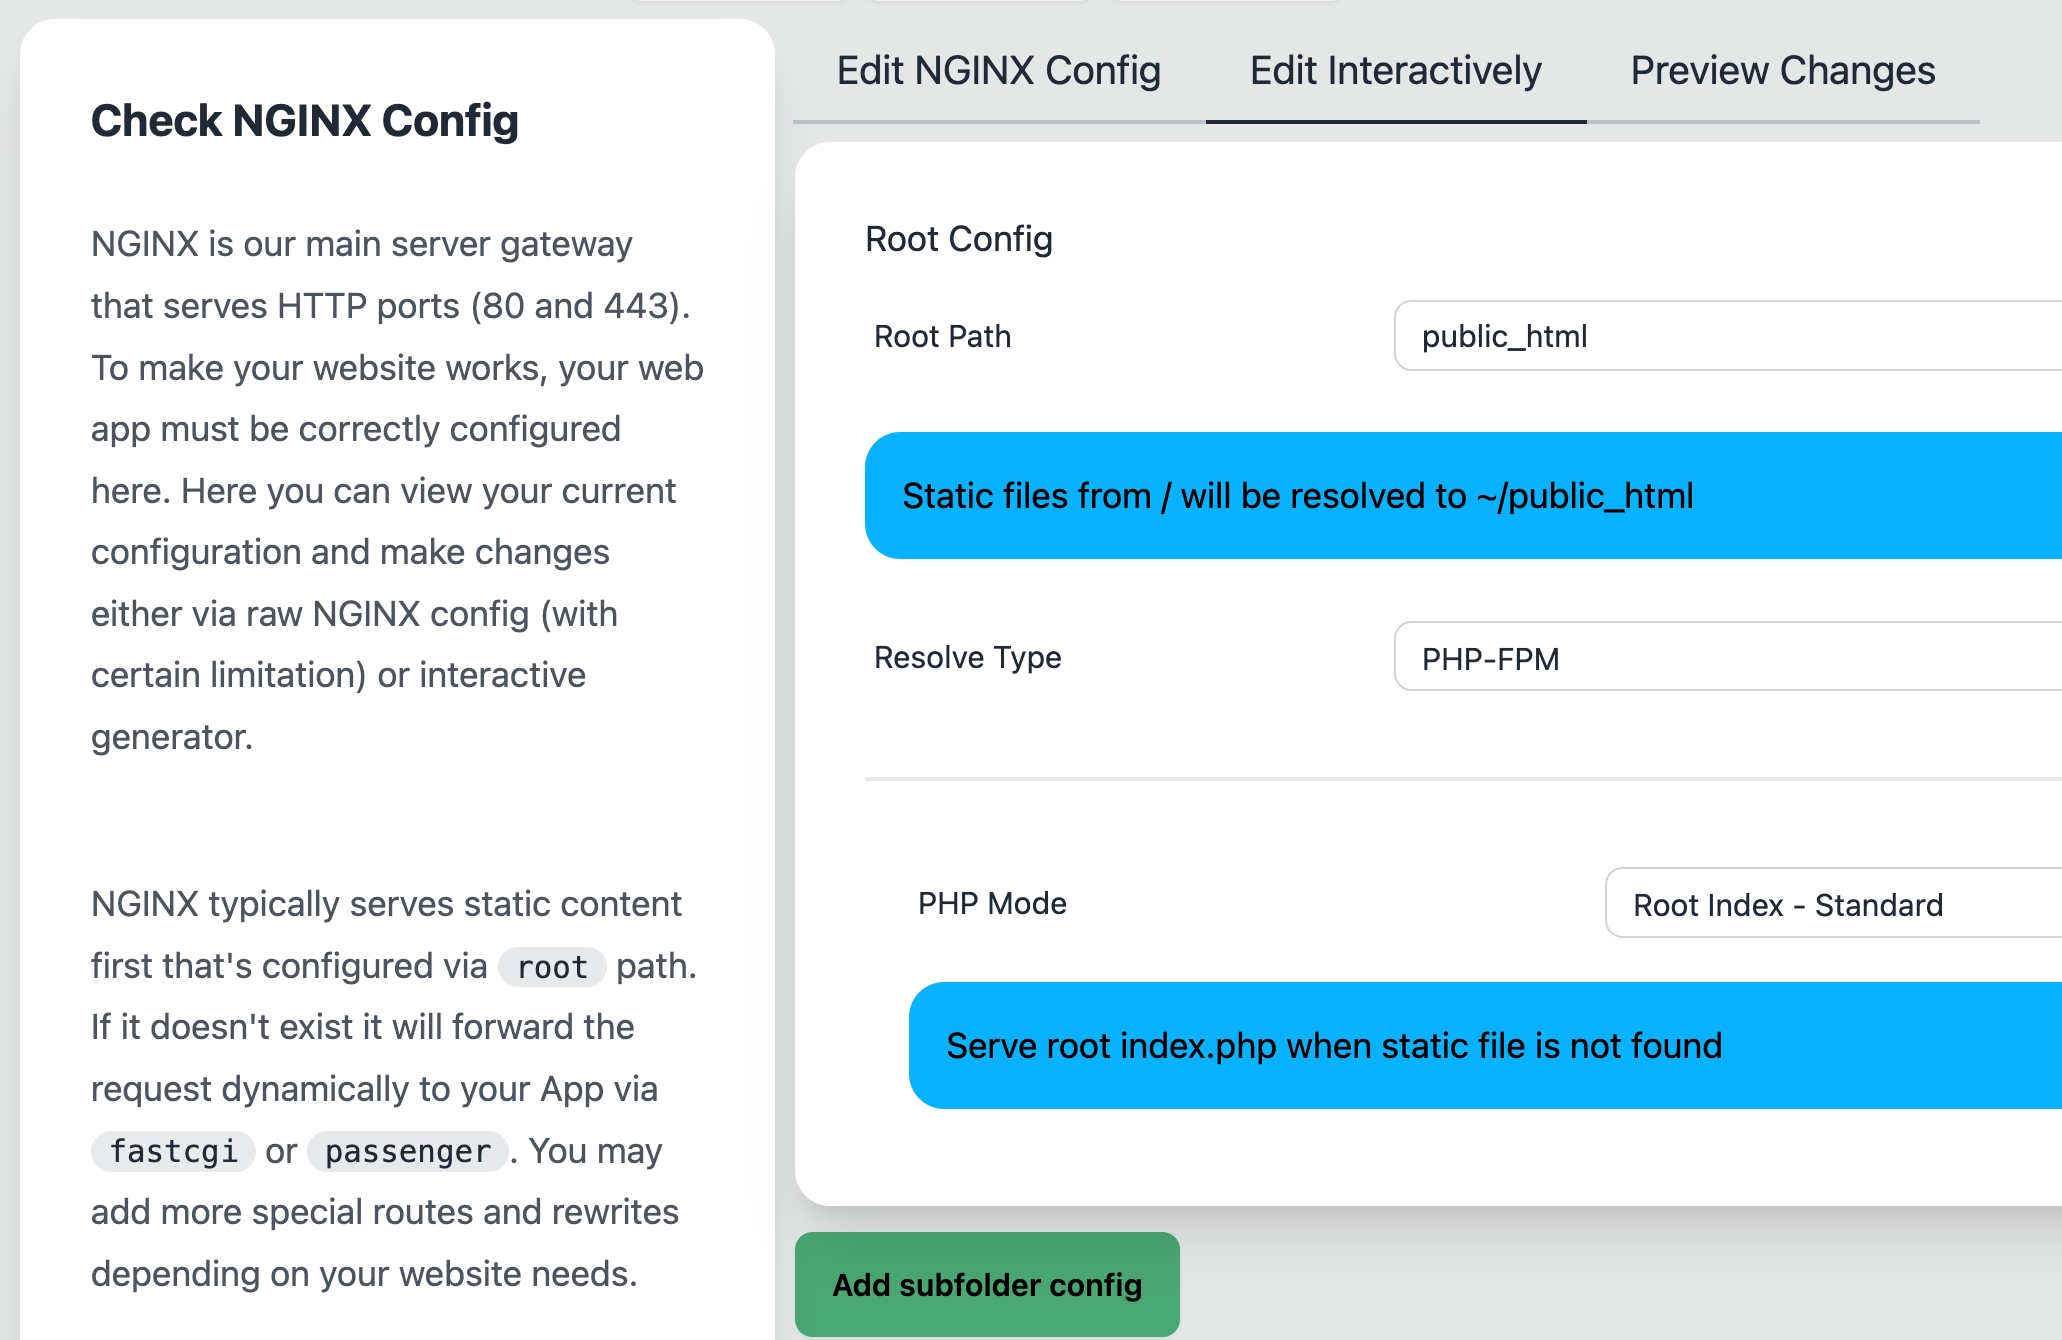
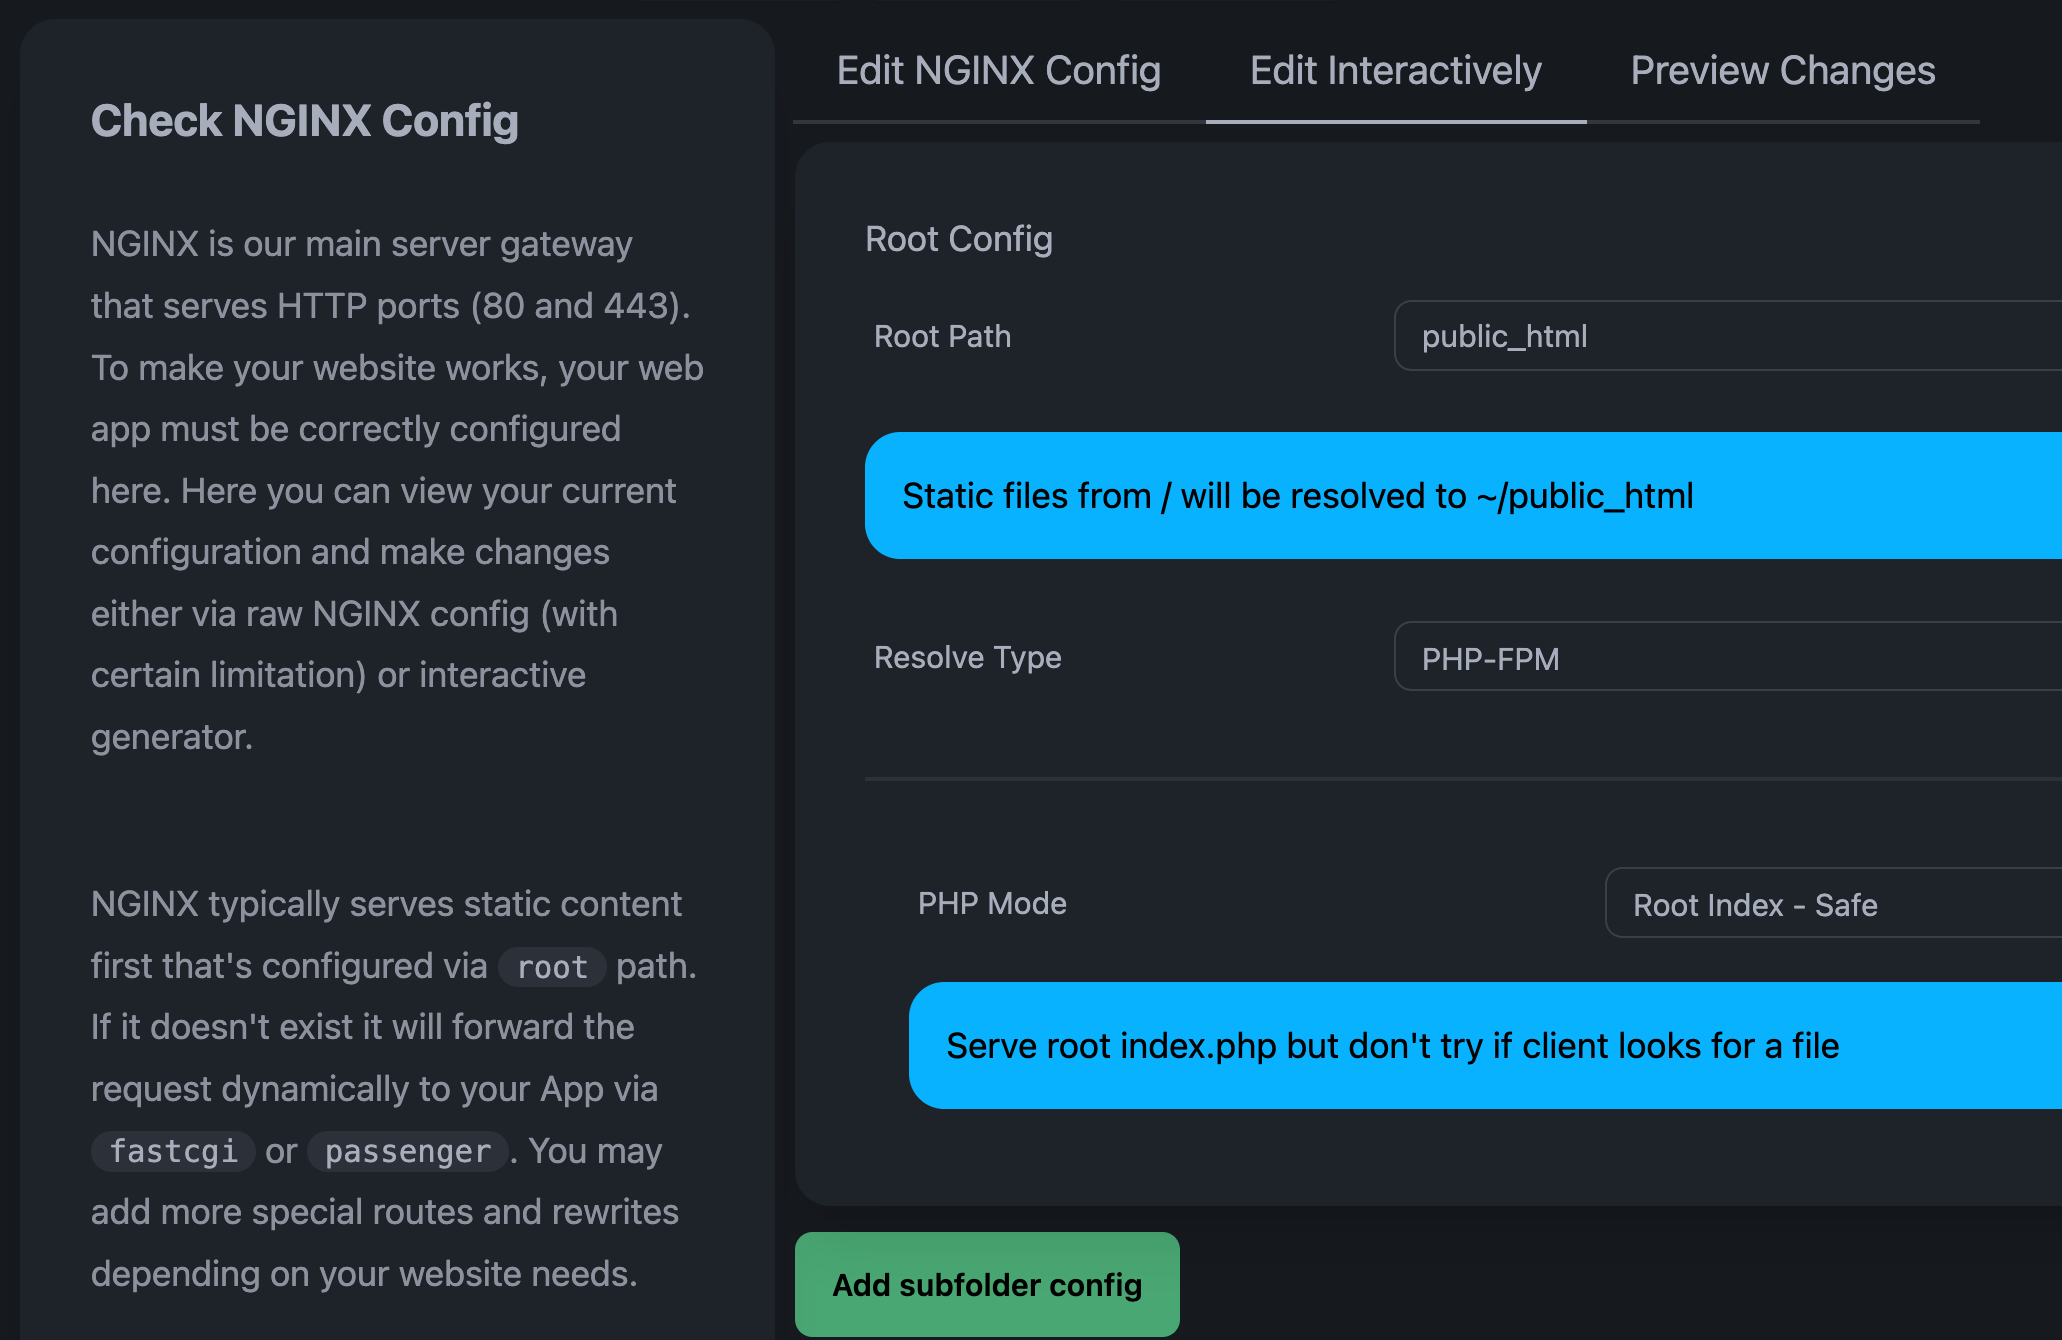
Because you are not given a sudo access, you can only setup HTTP traffic via this section. You also
don't need to setup your own daemon — your app can be spawned via app_start_command for all websites powered by other than PHP. Once your app is started by NGINX, site traffic from port 80 and 443 will be forwarded to your app via FastCGI if site is PHP or $PORT envar if ran with app_start_command.
Read more about how to configure it via NGINX Section
Remote development like running php artisan serve or npm run dev directly in the server won't work. You can use Visual Studio Code Remote Editing via SSH to forward ports to your device — or if you wish to open TCP port anyway, you can set it to listen at port >32000.
More Reading
Checkout our Deployment Guide to get in depth about our deployment systems!