Getting Started
Here in this page we will take a basic understanding about how DOM Cloud works and how to set up your own website quickly.
Create a Website
Go to create a website page. If you haven't logged in, you will be redirected to the login page. Below is the screenshot of that page.
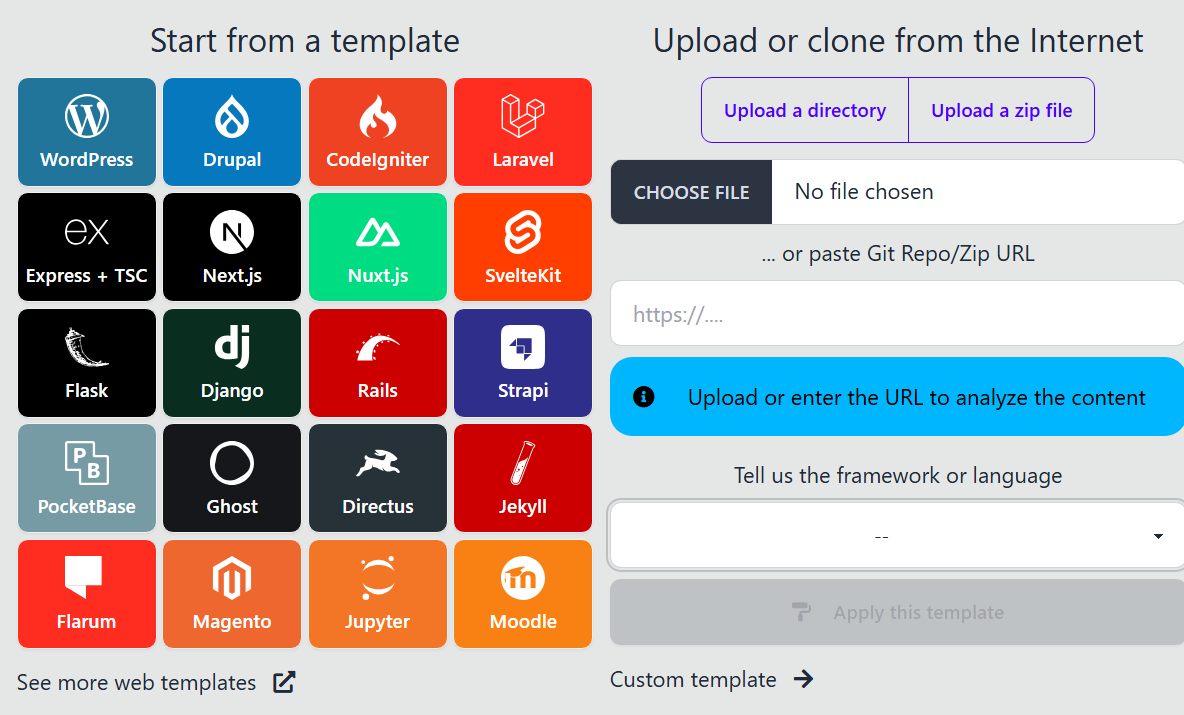
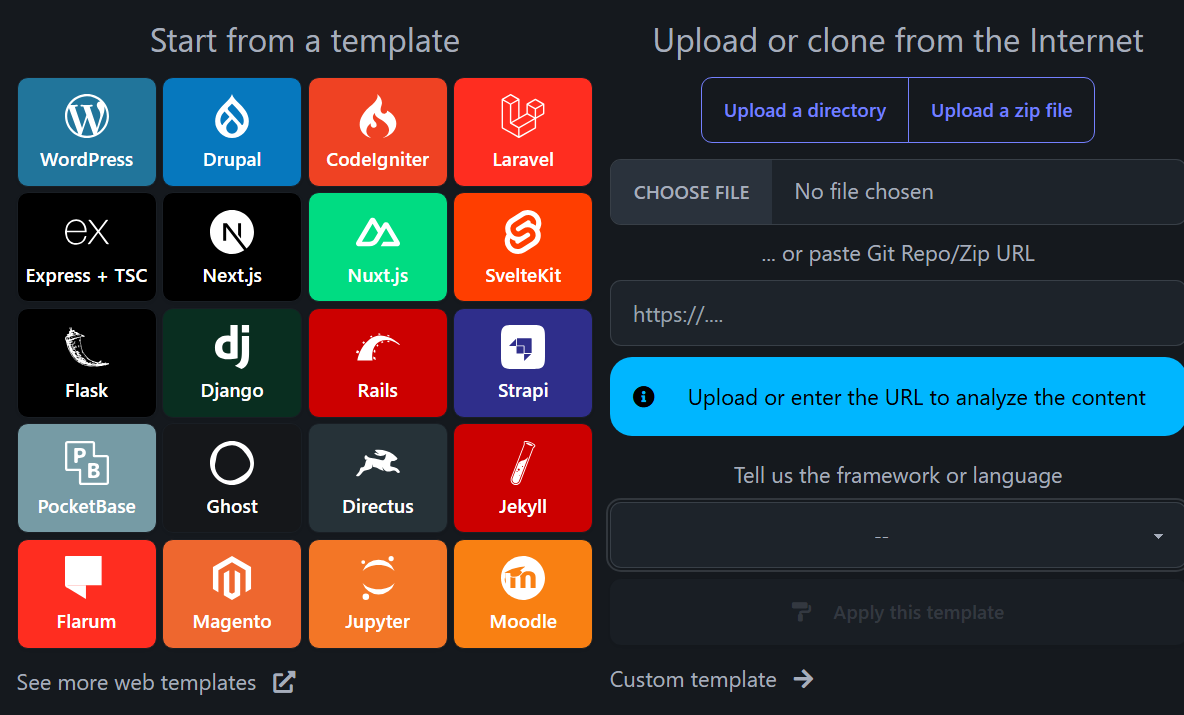
The left side is the template you want to start with, while the right side sets the domain name and the server where you want to host your website.
Left side
It's a template selector. It has three sections: Start From Template, Upload or Clone, Custom Template.
Start From Template
If you want to create a website from stratch, start from here. You just have to select which kind of framework or CMS you will start with.
The CMS or Framework can be further edited directly using their respective admin tools from the website or VS Code editor (read below).
Upload or Clone
If you have an existing project on GitHub or your local computer, use this option.
It's easy as dropping your project directory, or copy-pasting your repository URL on GitHub. Then, choose which framework or language it's used to.
If your GitHub repo is private, it will ask you to install a new SSH public key (so it can be cloned from this server). Read more about GitHub Integration, this includes set-up a webhook to keep the website in sync with latest commits in repo.
Right side
It has three fields: Username, Region, and Domain.
Username
This is the username you want to use to identify logins to your website. You can leave it random or use any username you want, but it must be unique. This username is invisible to the public.
Region
This is the server where you want to host your website. You can choose any server you want that is available, preferably close with you or your target visitors.
Domain
This is the domain name you want to use for your website. You can enter a custom domain that you own or switch to *.domcloud.dev if you have a paid plan. Read more about integrating custom domain here or default domains here.
Click "Add a Website"
After finishing the previous step, you will be directed to the runner page of the newly created website where you can watch the progress of the setup. Below is the screenshot of that page.
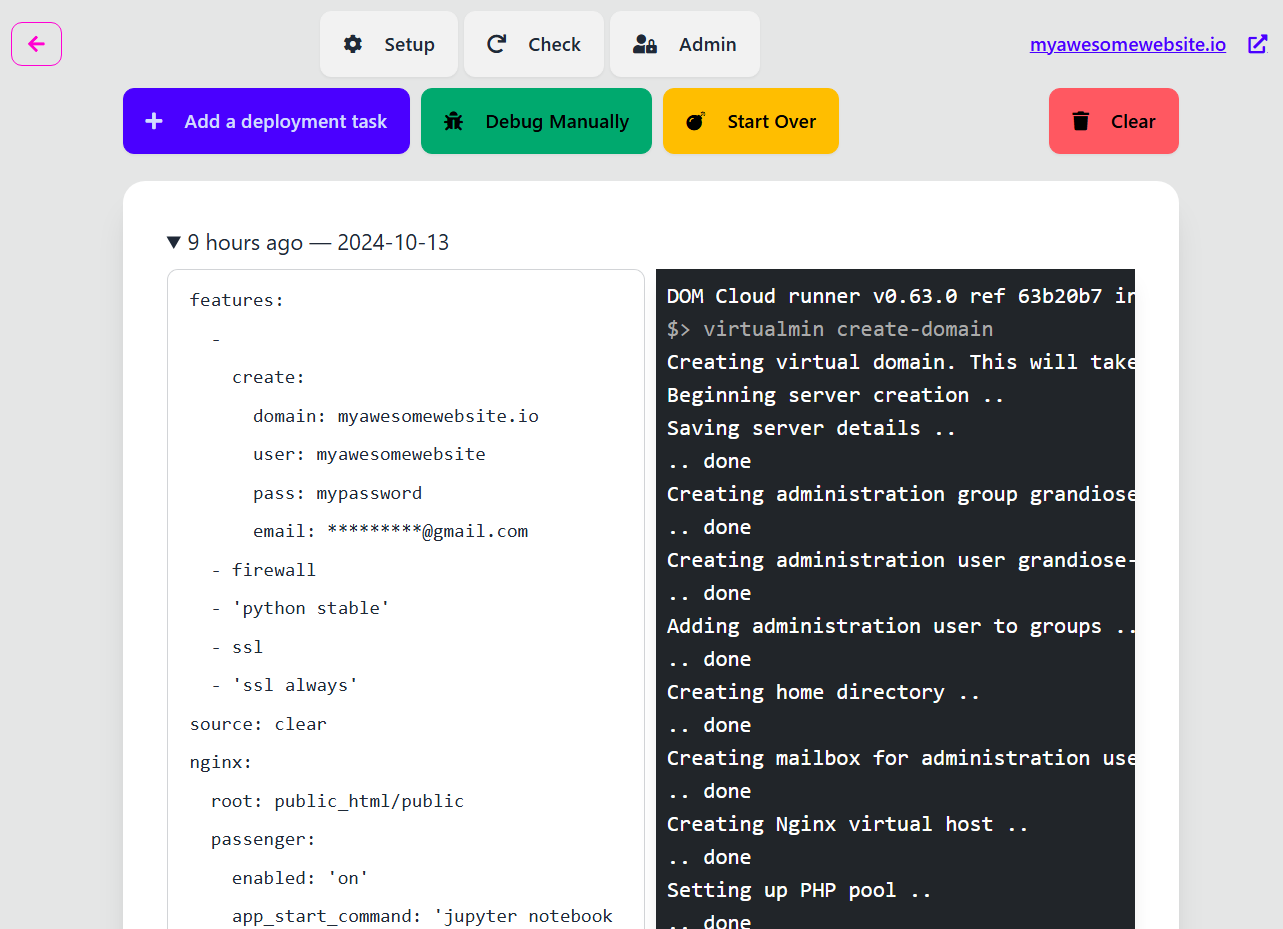
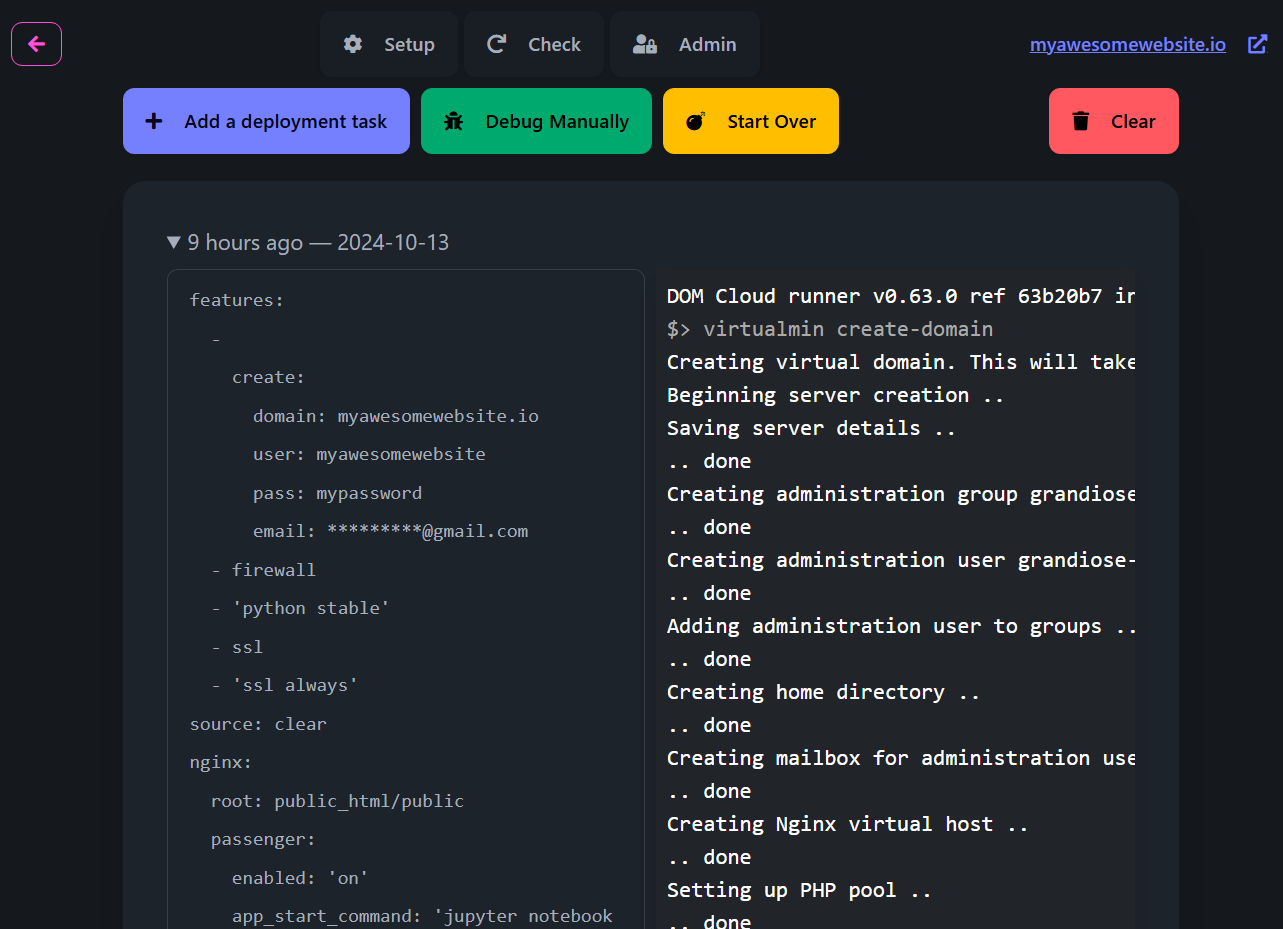
You have to wait until the setup is finished.
When it finished there will be a message saying "Your website is ready!" and a button to open the website when it's ready.
Managing Website
Every website has its own dashboard. Below is the screenshot of that page.
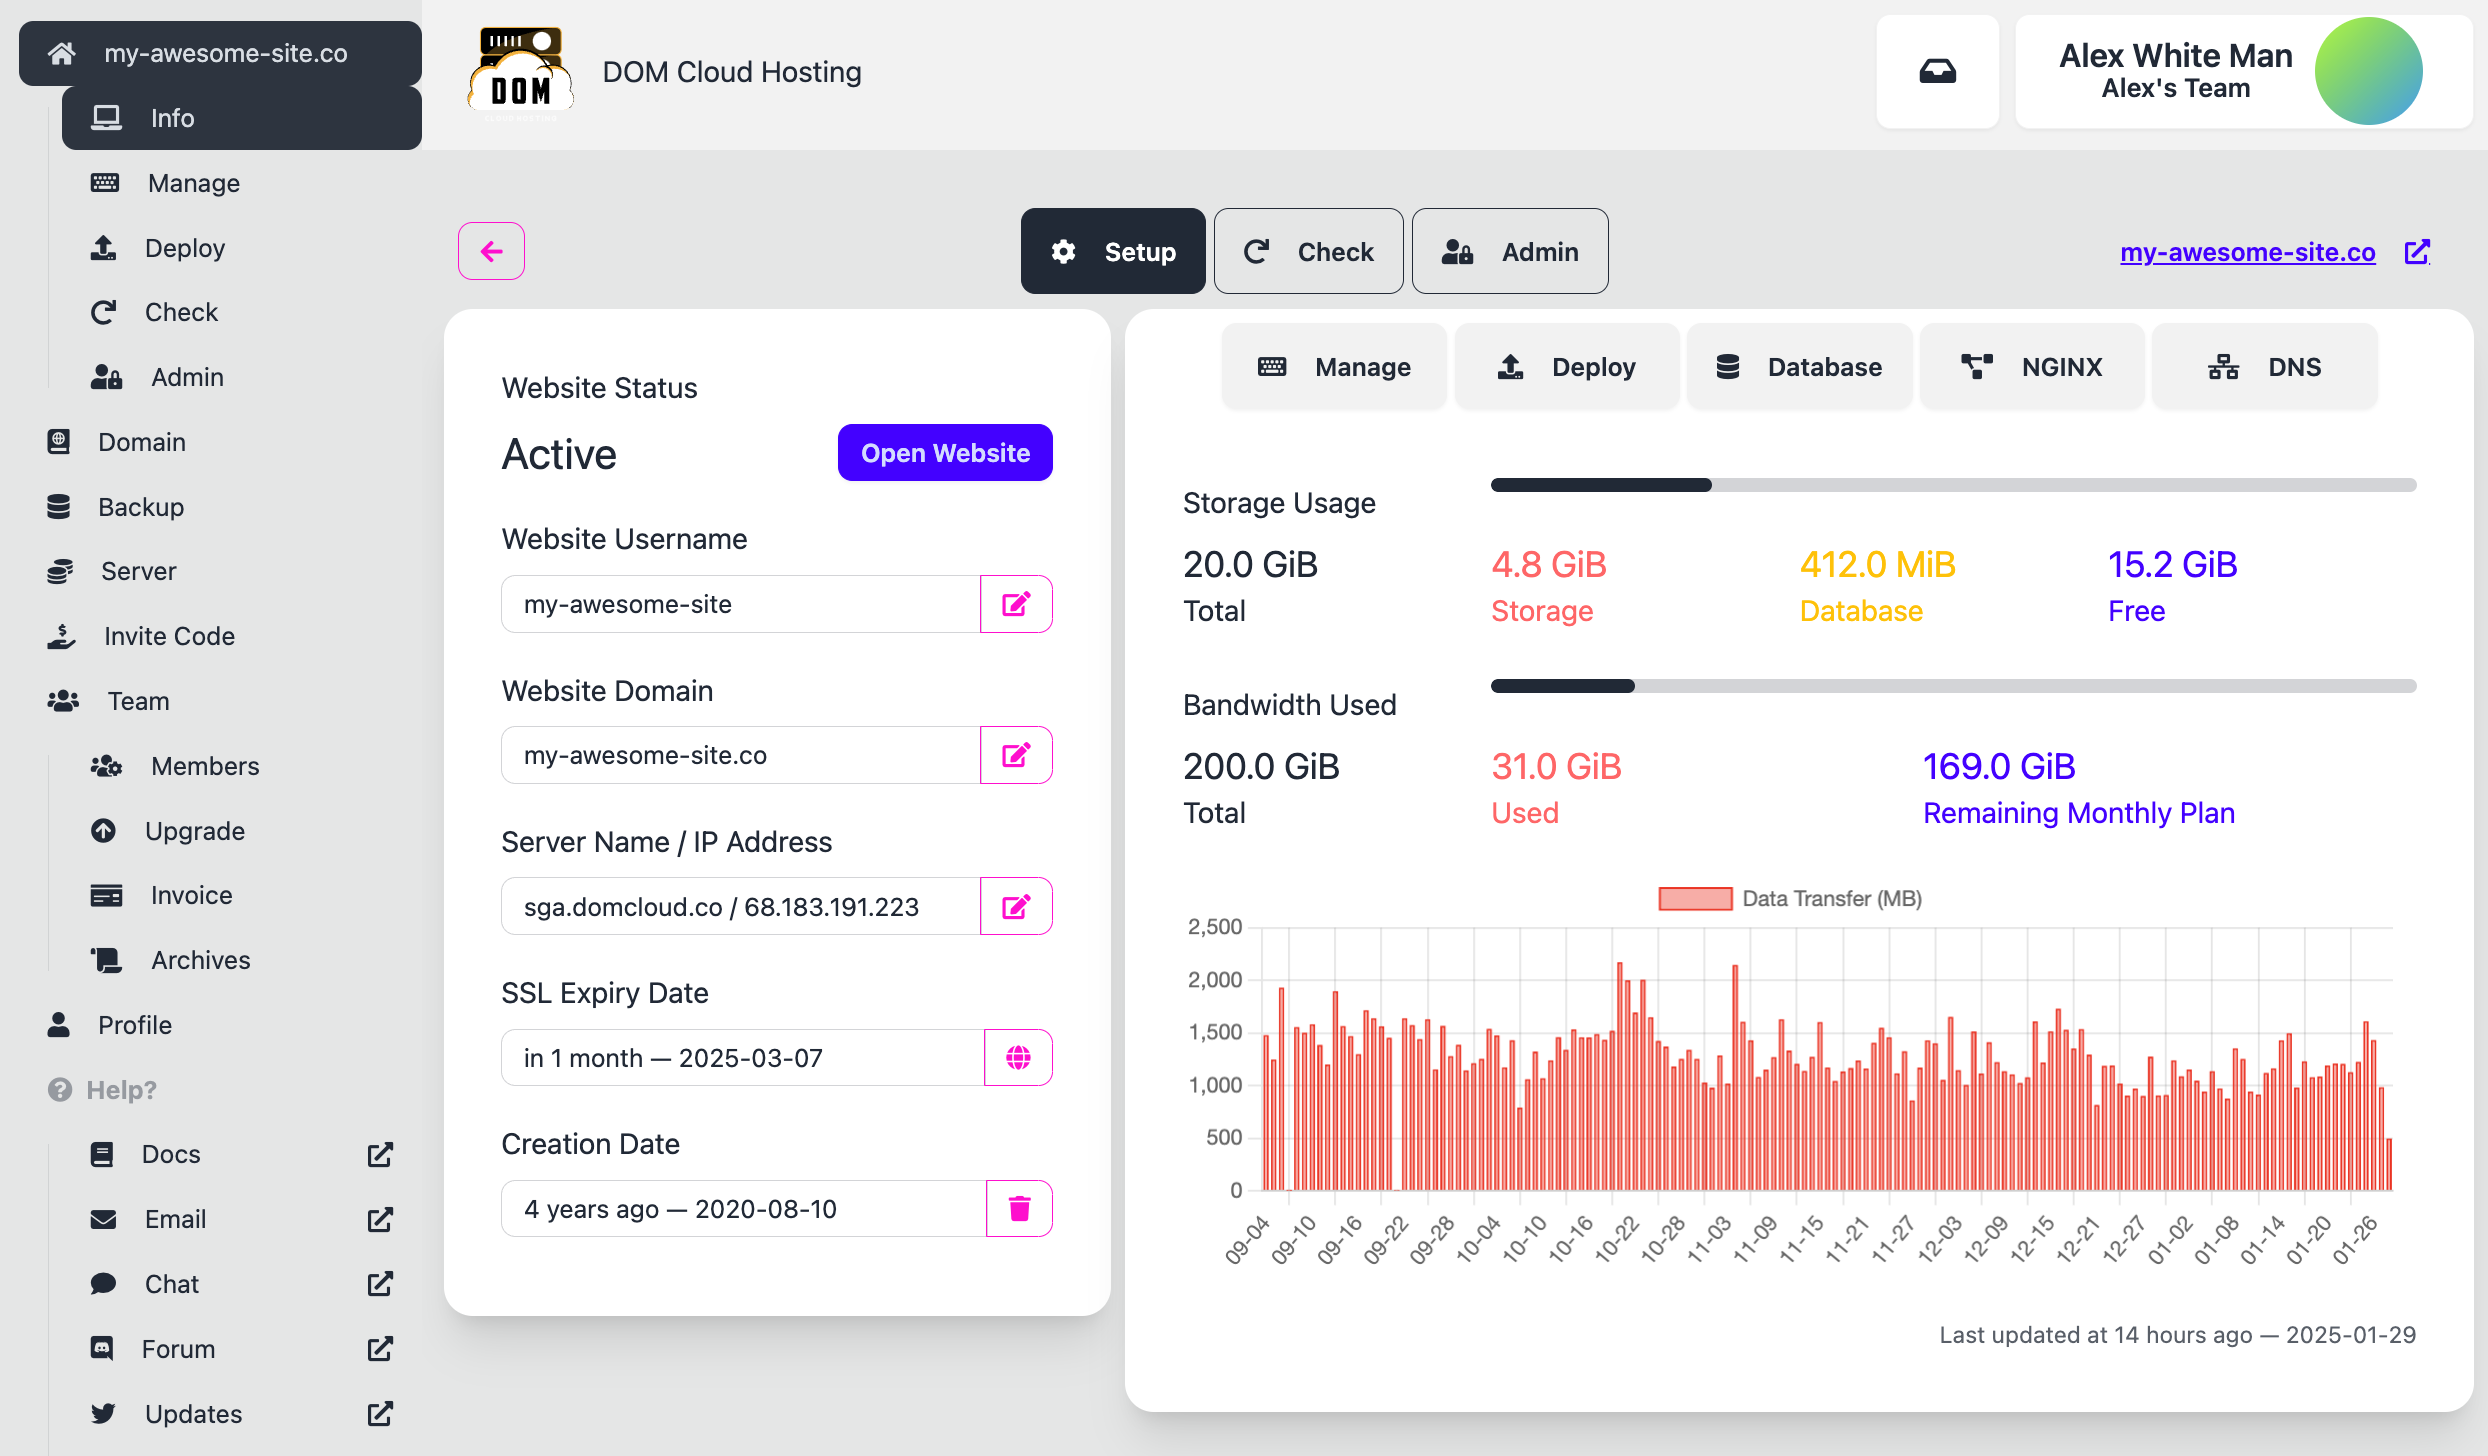
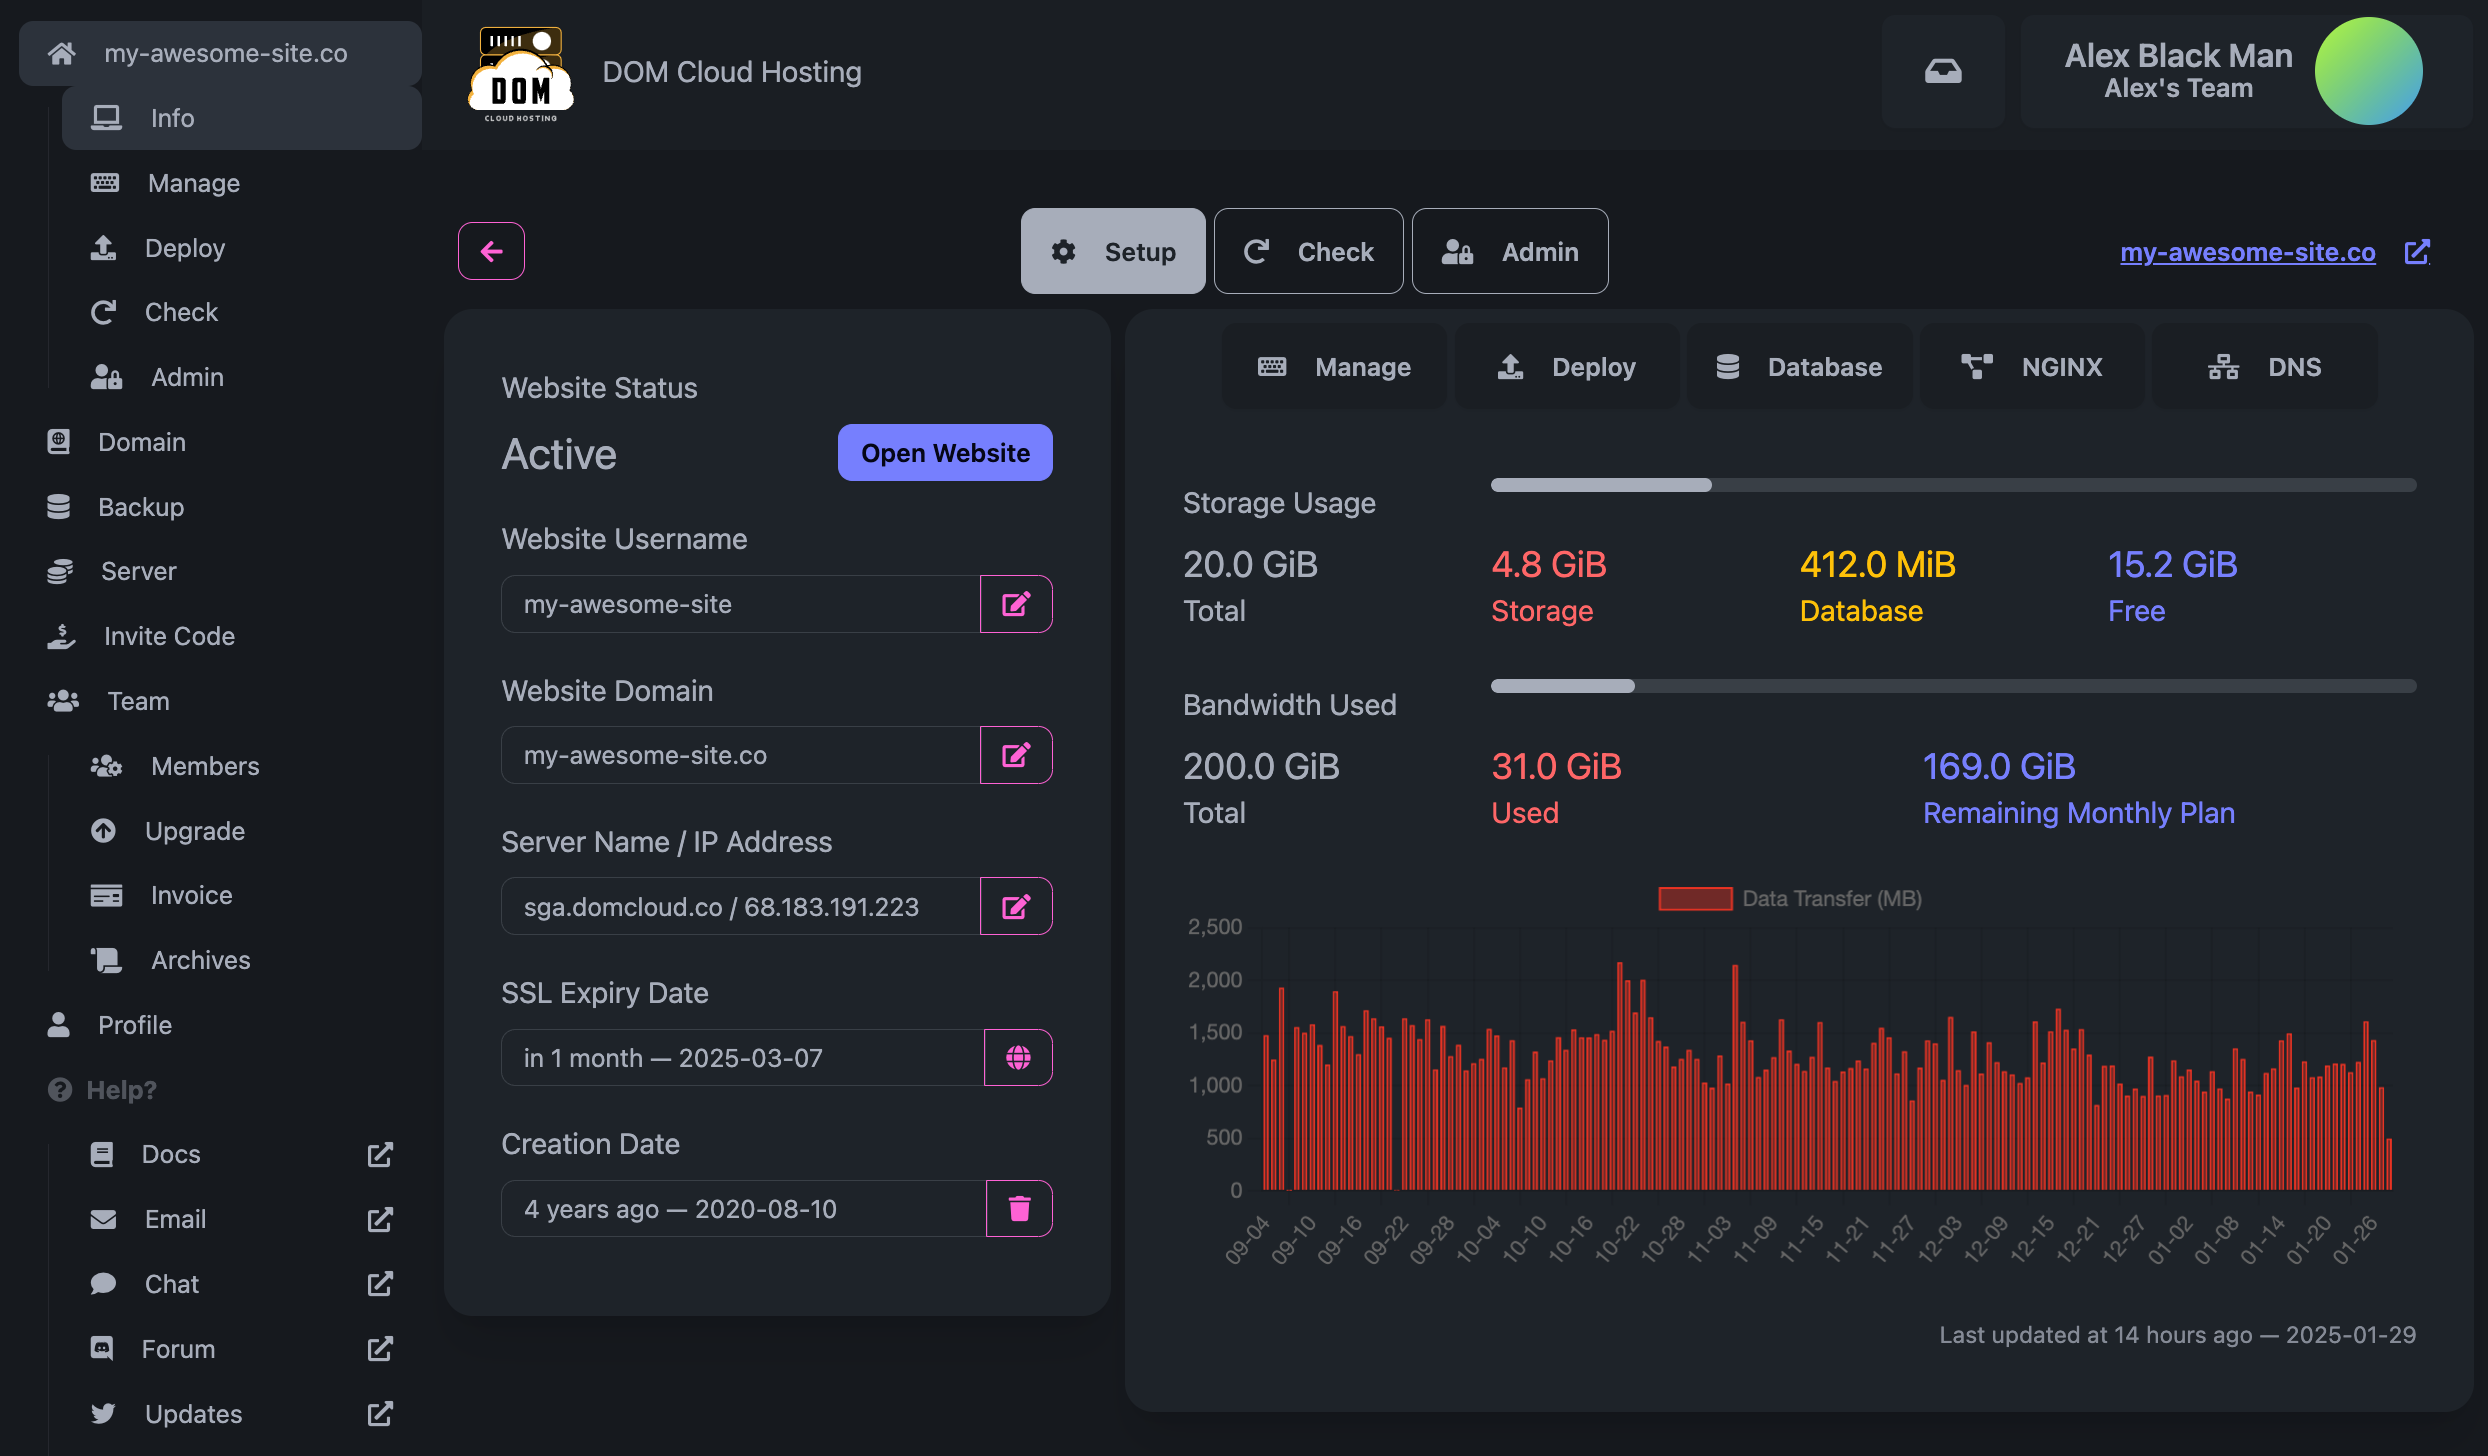
The Info section contains information about your website, such as some general information including storage usage, bandwidth usage, and the server where your website is hosted.
One particular useful tab that you'll use often is the Manage tab. It contains links to edit your website and also credentials to access your website. Below is the screenshot of that page.
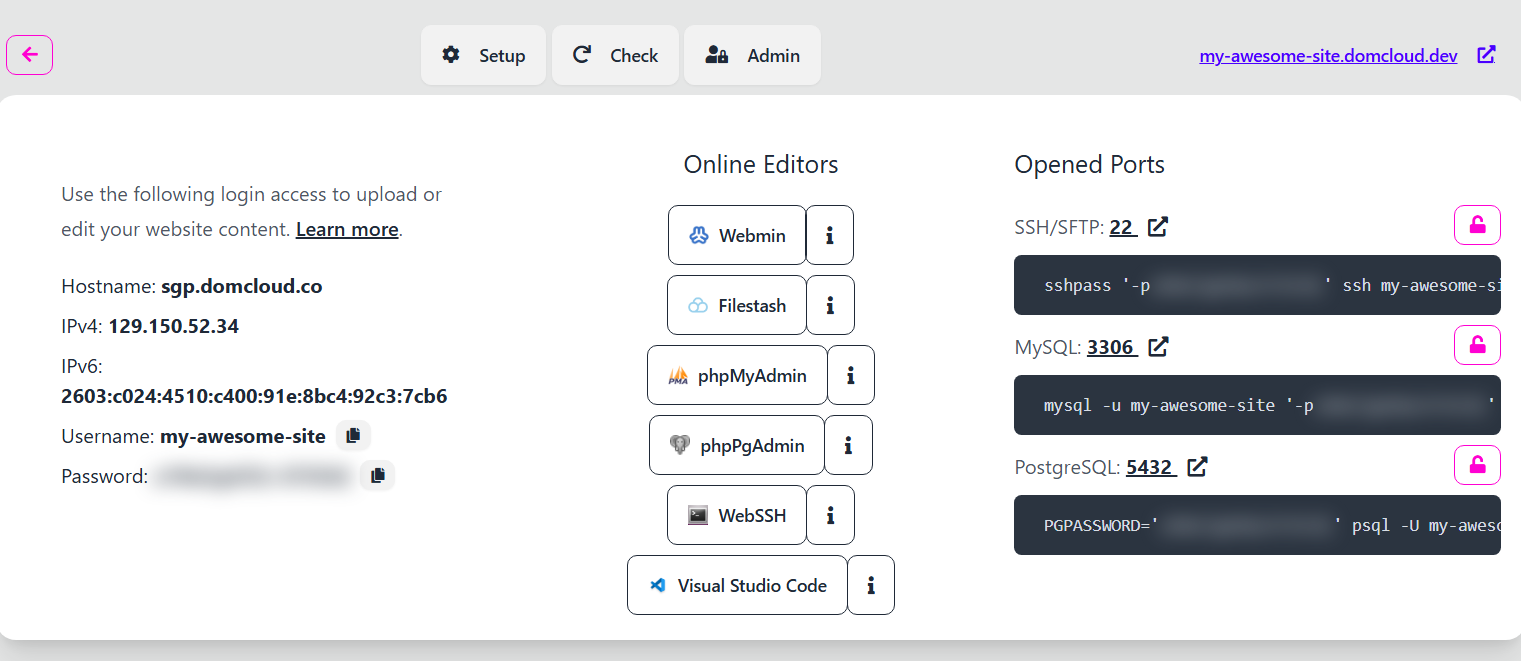
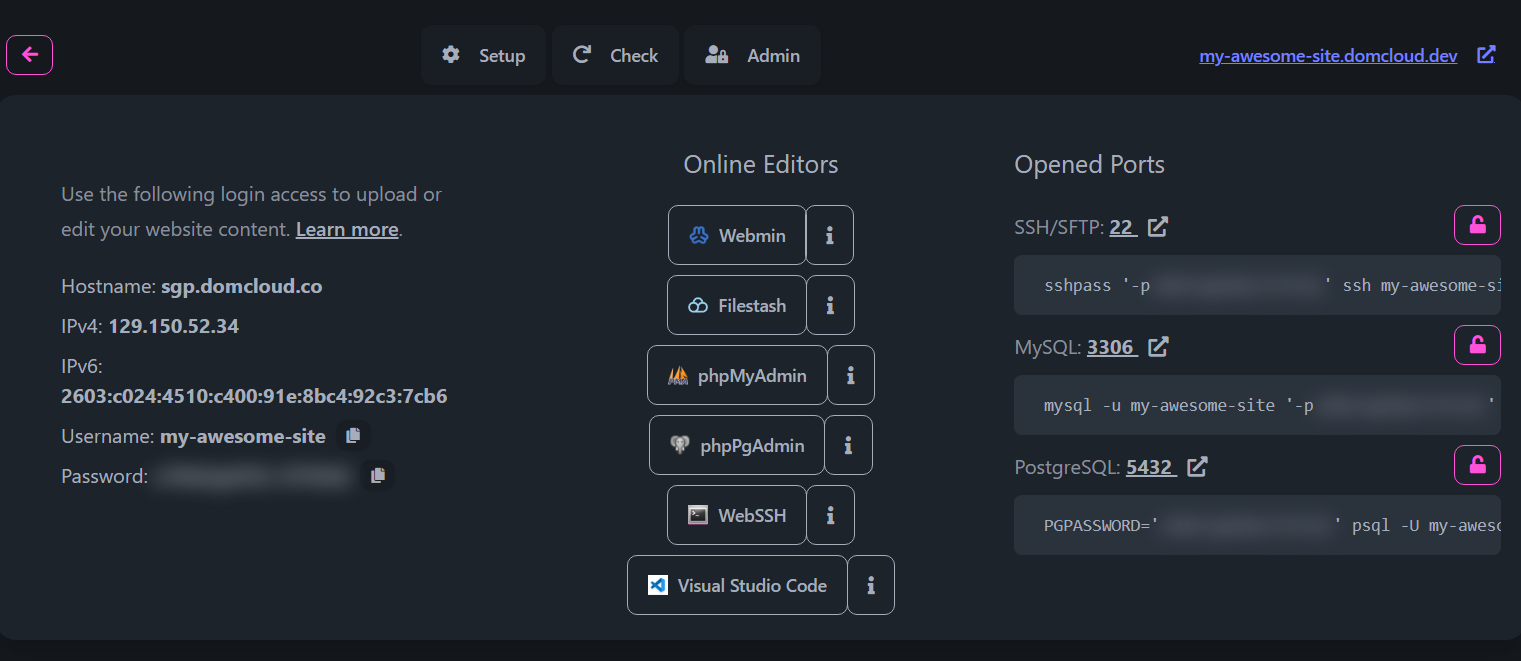
Tools that you can use to manage your website are:
Webmin
Webmin is a web-based system management tool. It's mostly useful for:
- Managing files using a web interface.
- Creating, importing or dropping database.
- Viewing NGINX access or error logs, and PHP logs.
- Set up additional things our portal UI doesn't cover.
PhpMyAdmin / PhpPgAdmin
PhpMyAdmin and PhpPgAdmin is a web-based database management tool for MariaDB and PostgreSQL, respectively. During entry, you will be asked for the database username and password, which is the same as your website username and password (in Manage tab).
Database is not enabled by default. If you have problem accessing the database, you need to enable the database first through the Deploy tab. Read more about Configuring Databases.
WebSSH
WebSSH is a web-based SSH client. It's useful for advanced installation that requires CLI access.
You can also access SSH through your desktop terminal. Open a terminal then type:
ssh <username>@<domain>
Visual Studio Code
This a link to Visual Studio Code to remotely edit the website using SSH. It's required to have the VS code installed on your computer. During entry, you will be asked for the SSH password, which is the same as your website password.
By default it opens ~/public_html. If you want to open a different directory, use the link from dropdown menu.
When asked for which server's OS type VS Code connecting to, choose Linux.
Read more about Remote Development using SSH
Deploy Tab
The deploy tab is where you can configure the rest of your website. Below is the screenshot of that page.
It's a powerful tool to configure (or automate) your website setup. It allows you to:
- Configure NGINX rules and define how to boots up your websites
- Configure databases, DNS, TLS, and other services
- Install additional languages and tools
- Run custom scripts to automate your deployment
This feature alone is what makes DOM Cloud different from other hosting providers. It's a powerful tool that allows you to configure your website in any way you want. We have dozens of templates (called recipes) to setup your website with various languages and tools. You can also create your own recipes and share it with others.
Read more about Deployments via Deploy Tab
Other things to aware
This section covers advanced concepts that you need to know to use DOM Cloud. There are many more to cover:
There's also a dedicated page for configuring a website for specific code language such as PHP, Node.JS, Python or with many CMS platforms or with many static page generator and so on. And also a dedicated page for integration with GitHub, VS Code, third-party custom domain, and soon.