Domain Name Server
DNS is a service that translates domain names to IP addresses.
Switching to our DNS
If you host a website with a custom domain, you need to point the name server (in any registrar where you buy the domain) to these below:
nsp.domcloud.co
nss.domcloud.co
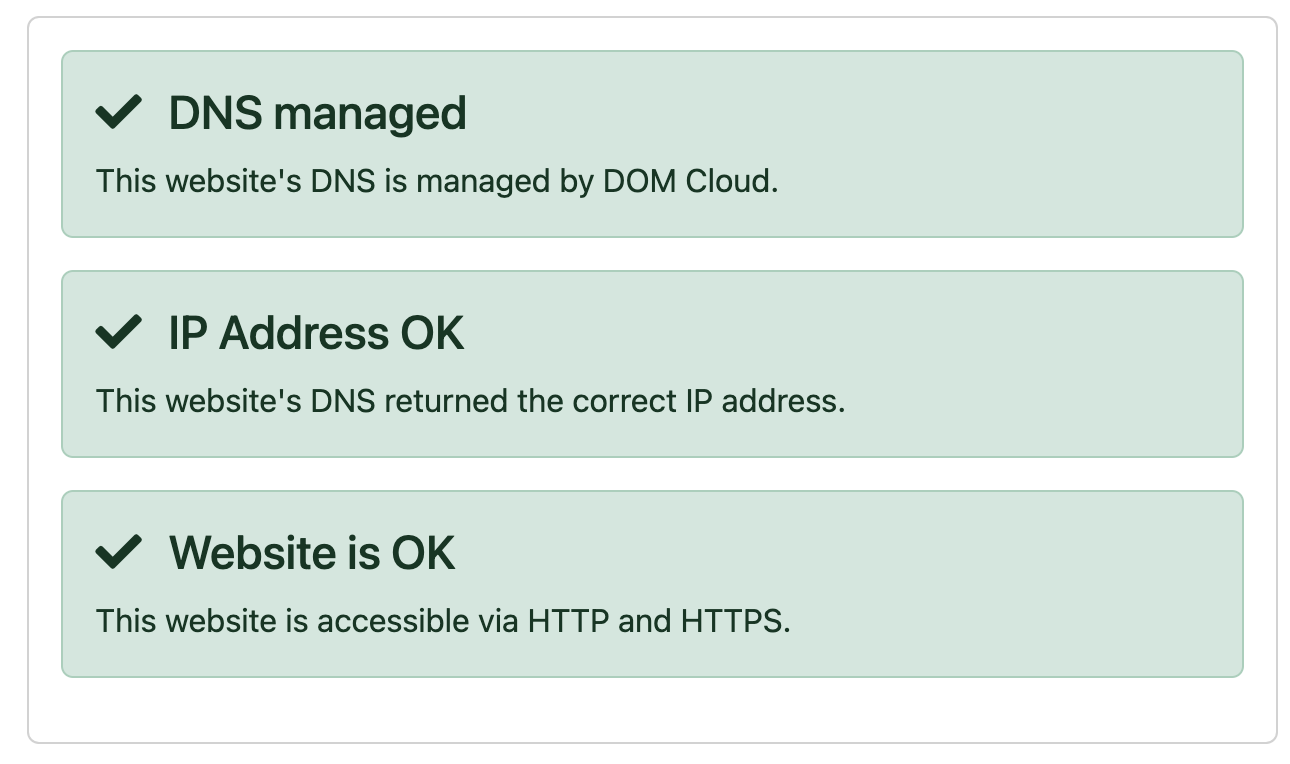
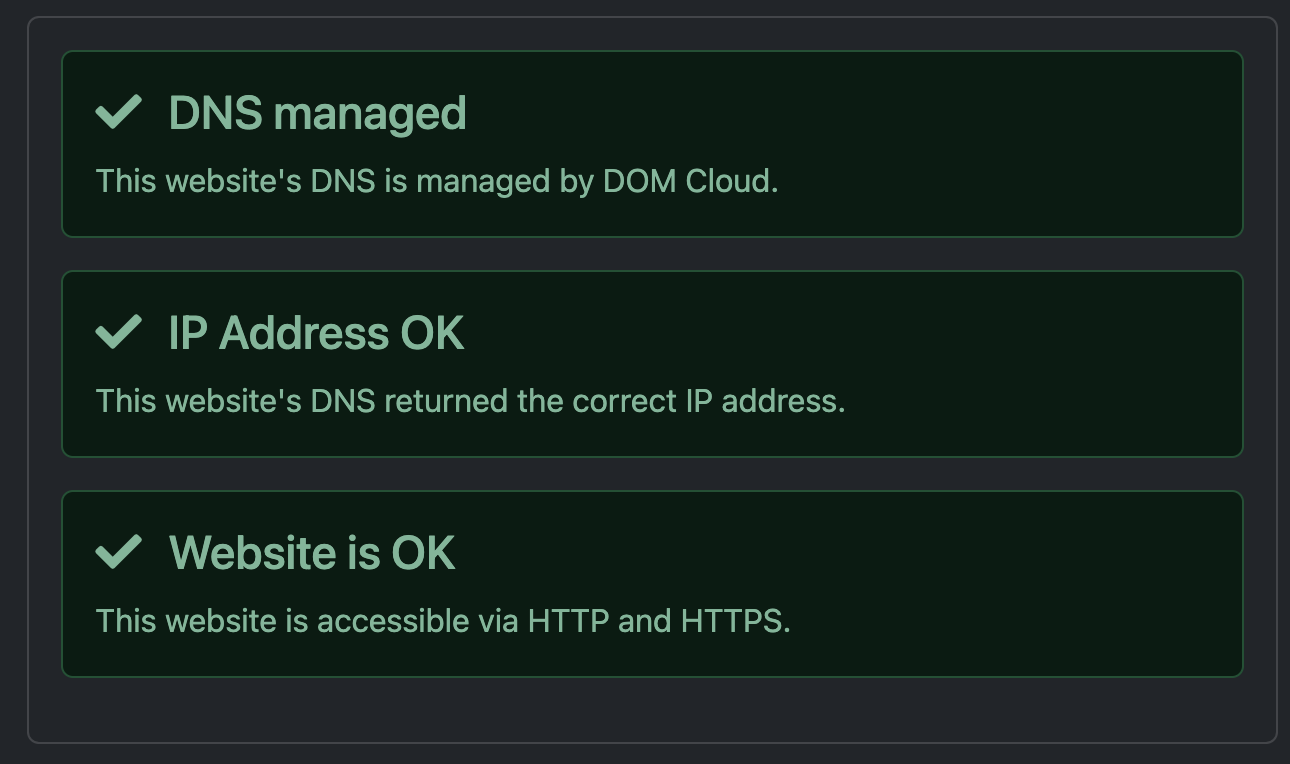
After that, change the website's domain name in DOM Cloud's Portal (Select a website -> Admin -> Change Domain). Then, check your website connectivity in menu Check -> Check Connection. If it shown like an image below, then your set up is done correctly.
To add custom records to your domain, you can use the DNS Manager via Webmin -> DNS Records. You can also add or delete DNS records using the deployment script.
This method delegates your domain name server to our server. There could be some issues if you using this method e.g. If you already share some records with other services or your registrar have a strict policy about DNSSEC. In this case you're better using CNAME/A+AAAA records instead.
How it works
When you create a website with custom domain (other than *.domcloud.dev), a dns service is activated from the deployment script, it's activated automatically by our Portal UI.
Any website where you buy a domain is called a registrar. We also sell domain, but you don't have to buy a domain from us, you just have to buy it from somewhere and set the nameserver to nsp.domcloud.co and nss.domcloud.co, which means that your domain DNS will be handled to us.
Usually changing a name server takes a hour to a day to propagate across internet.
Directly add CNAME or A+AAAA record
If you don't want giving a whole DNS to us, for example because you only host a subdomain here or you want a to better DNS handles it for you (e.g. Cloudflare), then you can directly add CNAME or A+AAAA at your DNS provider.
Firstly, go to Manage tab at your website portal. At top left you'll find these information:
- Hostname: sga.domcloud.id
- IPv4: 68.183.191.223
- IPv6: 2400:6180:0:d1::770:4001
Different server location provides different hostname and IP address!
For example we'll hosting sub.yourdomain.com at DOM Cloud but using Cloudflare DNS, then in Cloudflare, add these records:
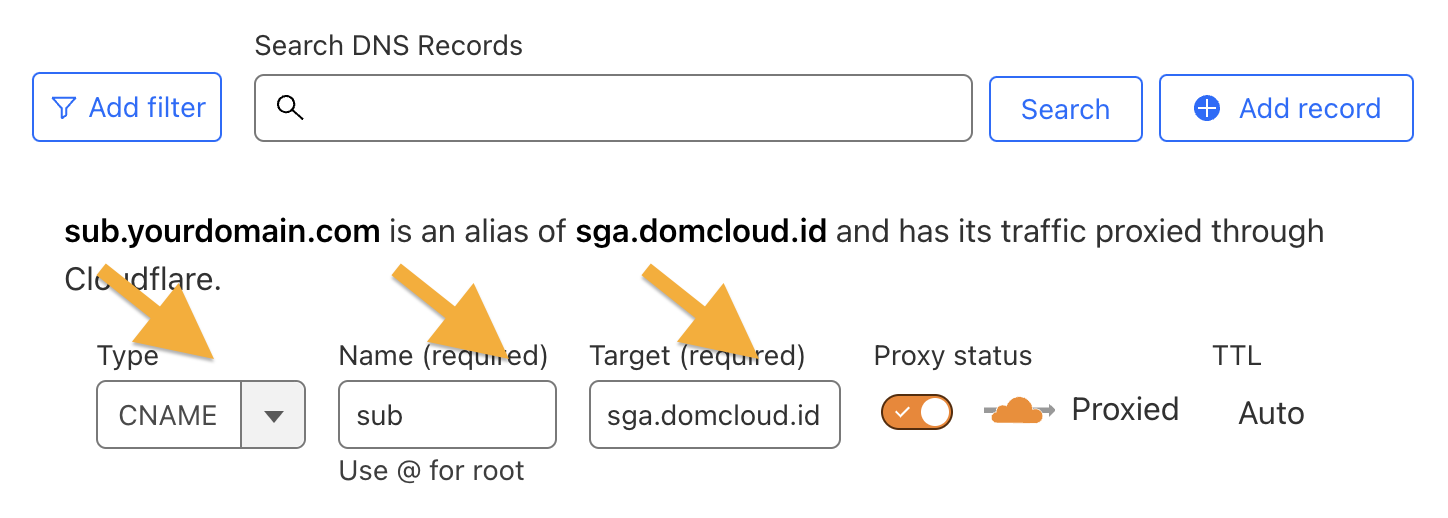
CNAME is recommended instead of providing A and AAAA records, which directly giving an IP address. But it may be preferable to give A and AAAA records if you need to add e.g. root/apex domain.
If you experience infinite redirects when using Cloudflare, disable its proxy
(under Proxy status).
Go watch some YouTube related to DNS servers, examples:
Sharing A Domain
If you host a course or school/institutional and interested in using our platform for hosting student projects, your students (verified by using institutional emails to register an account) can be free of charge by using your existing institutional domain by setup these records.
Let's say you want to share *.sites.yourschool.edu domain to your staffs and students that have access to emails under @yourschool.edu and @student.yourschool.edu. Then in your add these in your DNS:
- CNAME or A+AAAA records for wildcard domain (
*.sites.yourschool.edu) to one of our servers. - a TXT record for base domain (
sites.yourschool.edu) with valuedomcloud-authorized-email-domains=yourschool.edu,student.yourschool.edufor additional security.
After that any account that uses @student.yourschool.edu or @yourschool.edu can register *.sites.yourschool.edu domains.
Your students and staffs must register a Google/GitHub login that uses @yourschool.edu / @student.yourschool.edu or after adding and verifying a secondary email assosiated with that.
Absense of TXT record while adding a wildcard CNAME/A+AAAA records will make anyone can register under your domain for bad purposes without permission!
Troubleshooting
DNS can be verified by using nslookup from your local terminal.
Checking if DNS is working at server
First, make sure that DNS is enabled, to do that enter nslookup <your-domain> <name-server>, for example:
Server:		nsp.domcloud.co
Address:	68.183.191.223#53

Non-authoritative answer:
Name:	sga.domcloud.id
Address: 68.183.191.223
If the second address matches with IP address shown from manage tab, then DNS is enabled correctly. Any nonexistent domain is either returning wrong IP address or just refusing to answer depending on your local ISP settings:
Server:		nsp.domcloud.co
Address:	68.183.191.223#53

** server can't find nonexistantdomain.com: REFUSED
If that's the case then you need to enable DNS via the deployment script.
Checking if DNS is working at your end
Just type nslookup <your-domain> at your terminal and it will use your local DNS. For example:
Server:		1.1.1.1
Address:	1.1.1.1#53

Non-authoritative answer:
Name:	sga.domcloud.id
Address: 68.183.191.223
In that case my device talks to 1.1.1.1 to find that sga.domcloud.id points to 68.183.191.223, which is a correct answer.
A non existing DNS server may simply refuse to answer, or if not, gives incorrect IP address.
Server:		1.1.1.1
Address:	1.1.1.1#53

** server can't find nonexistantdomain.com: NXDOMAIN
If that's the case try double checking the NS entries in your registrar, or wait until all caches invalidates.
Temporarily skip DNS at your end
You can skip configuring DNS altogether by directly adding an IP record to /etc/hosts:
68.183.191.223 nonexistantdomain.com
This way your device will happily points nonexistantdomain.com to 68.183.191.223 without dealing with DNS servers. Save after editing and restart your browser.
Note that modifying /etc/hosts doesn't make the world care, at least your phone won't pickup that /etc/hosts you edited. This is why you have to buy a domain from a registrar.